Remediating Wood Rot
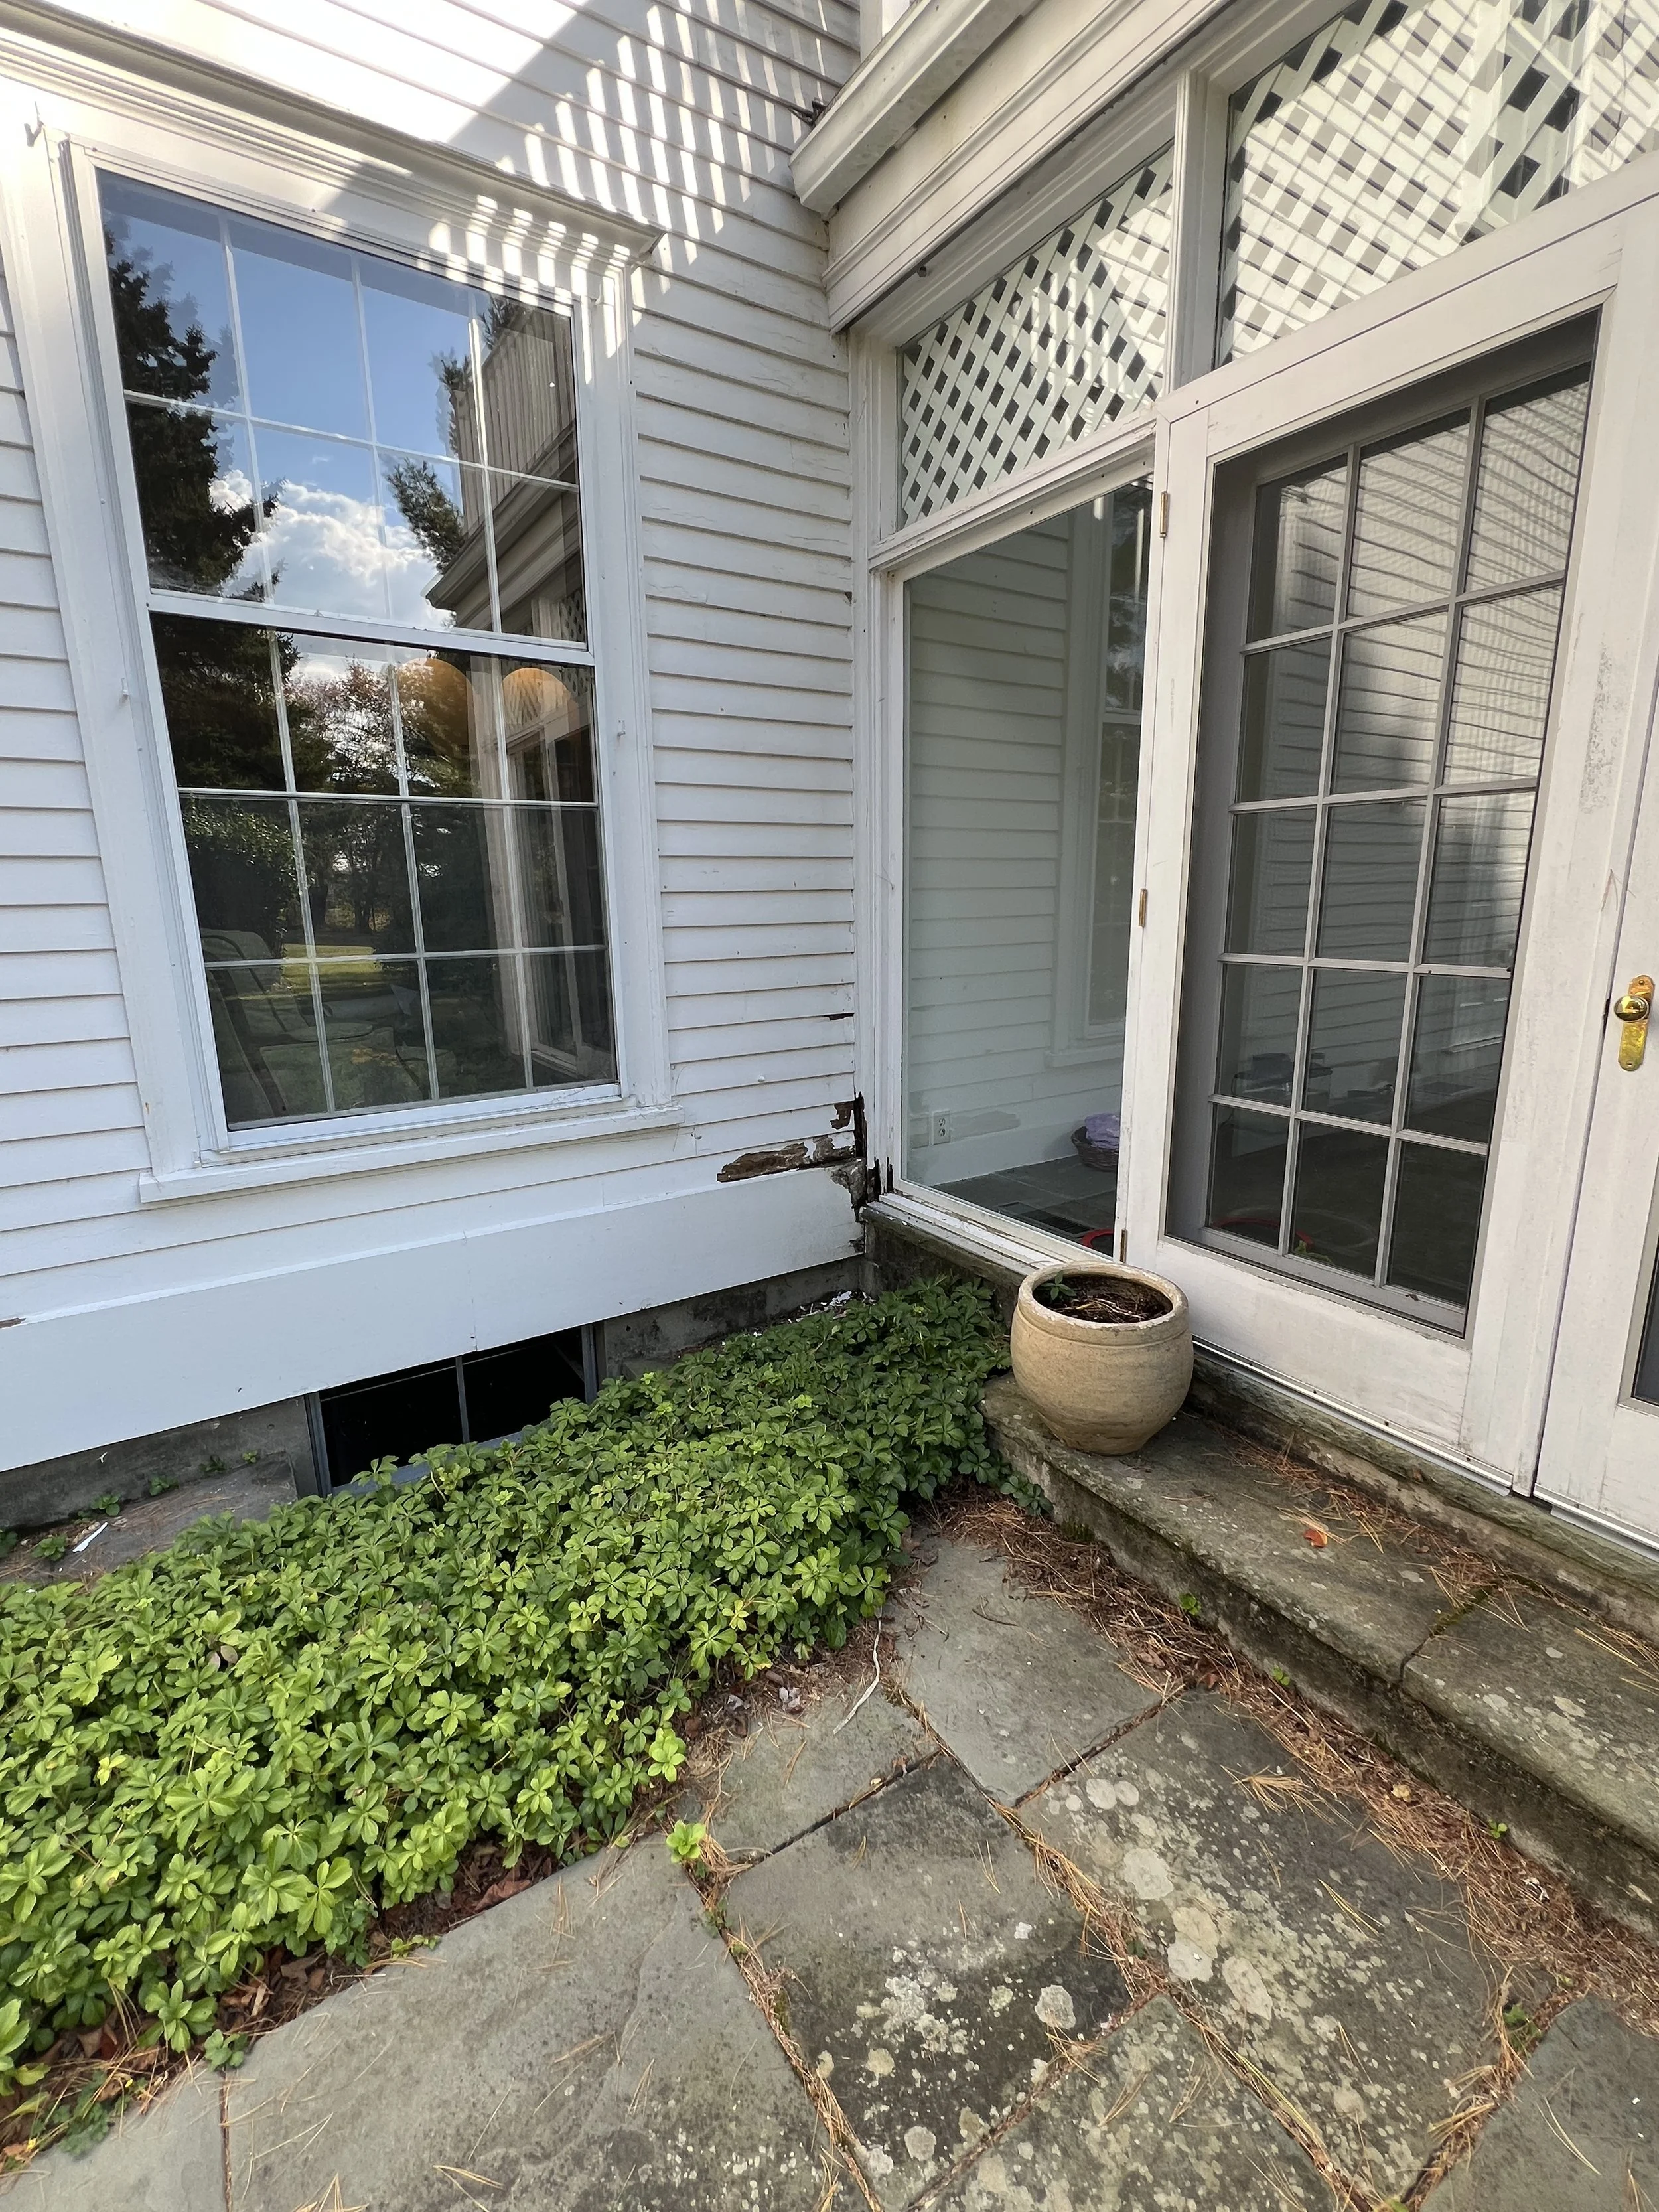
We knew there was some wood rot in the trim when we bought Grandview. Especially around the sunroom. But it turns out that a fresh coat of paint was hiding more than we had bargained for. No turning back now - unless we want the house to fall apart, the only way forward is straight through.
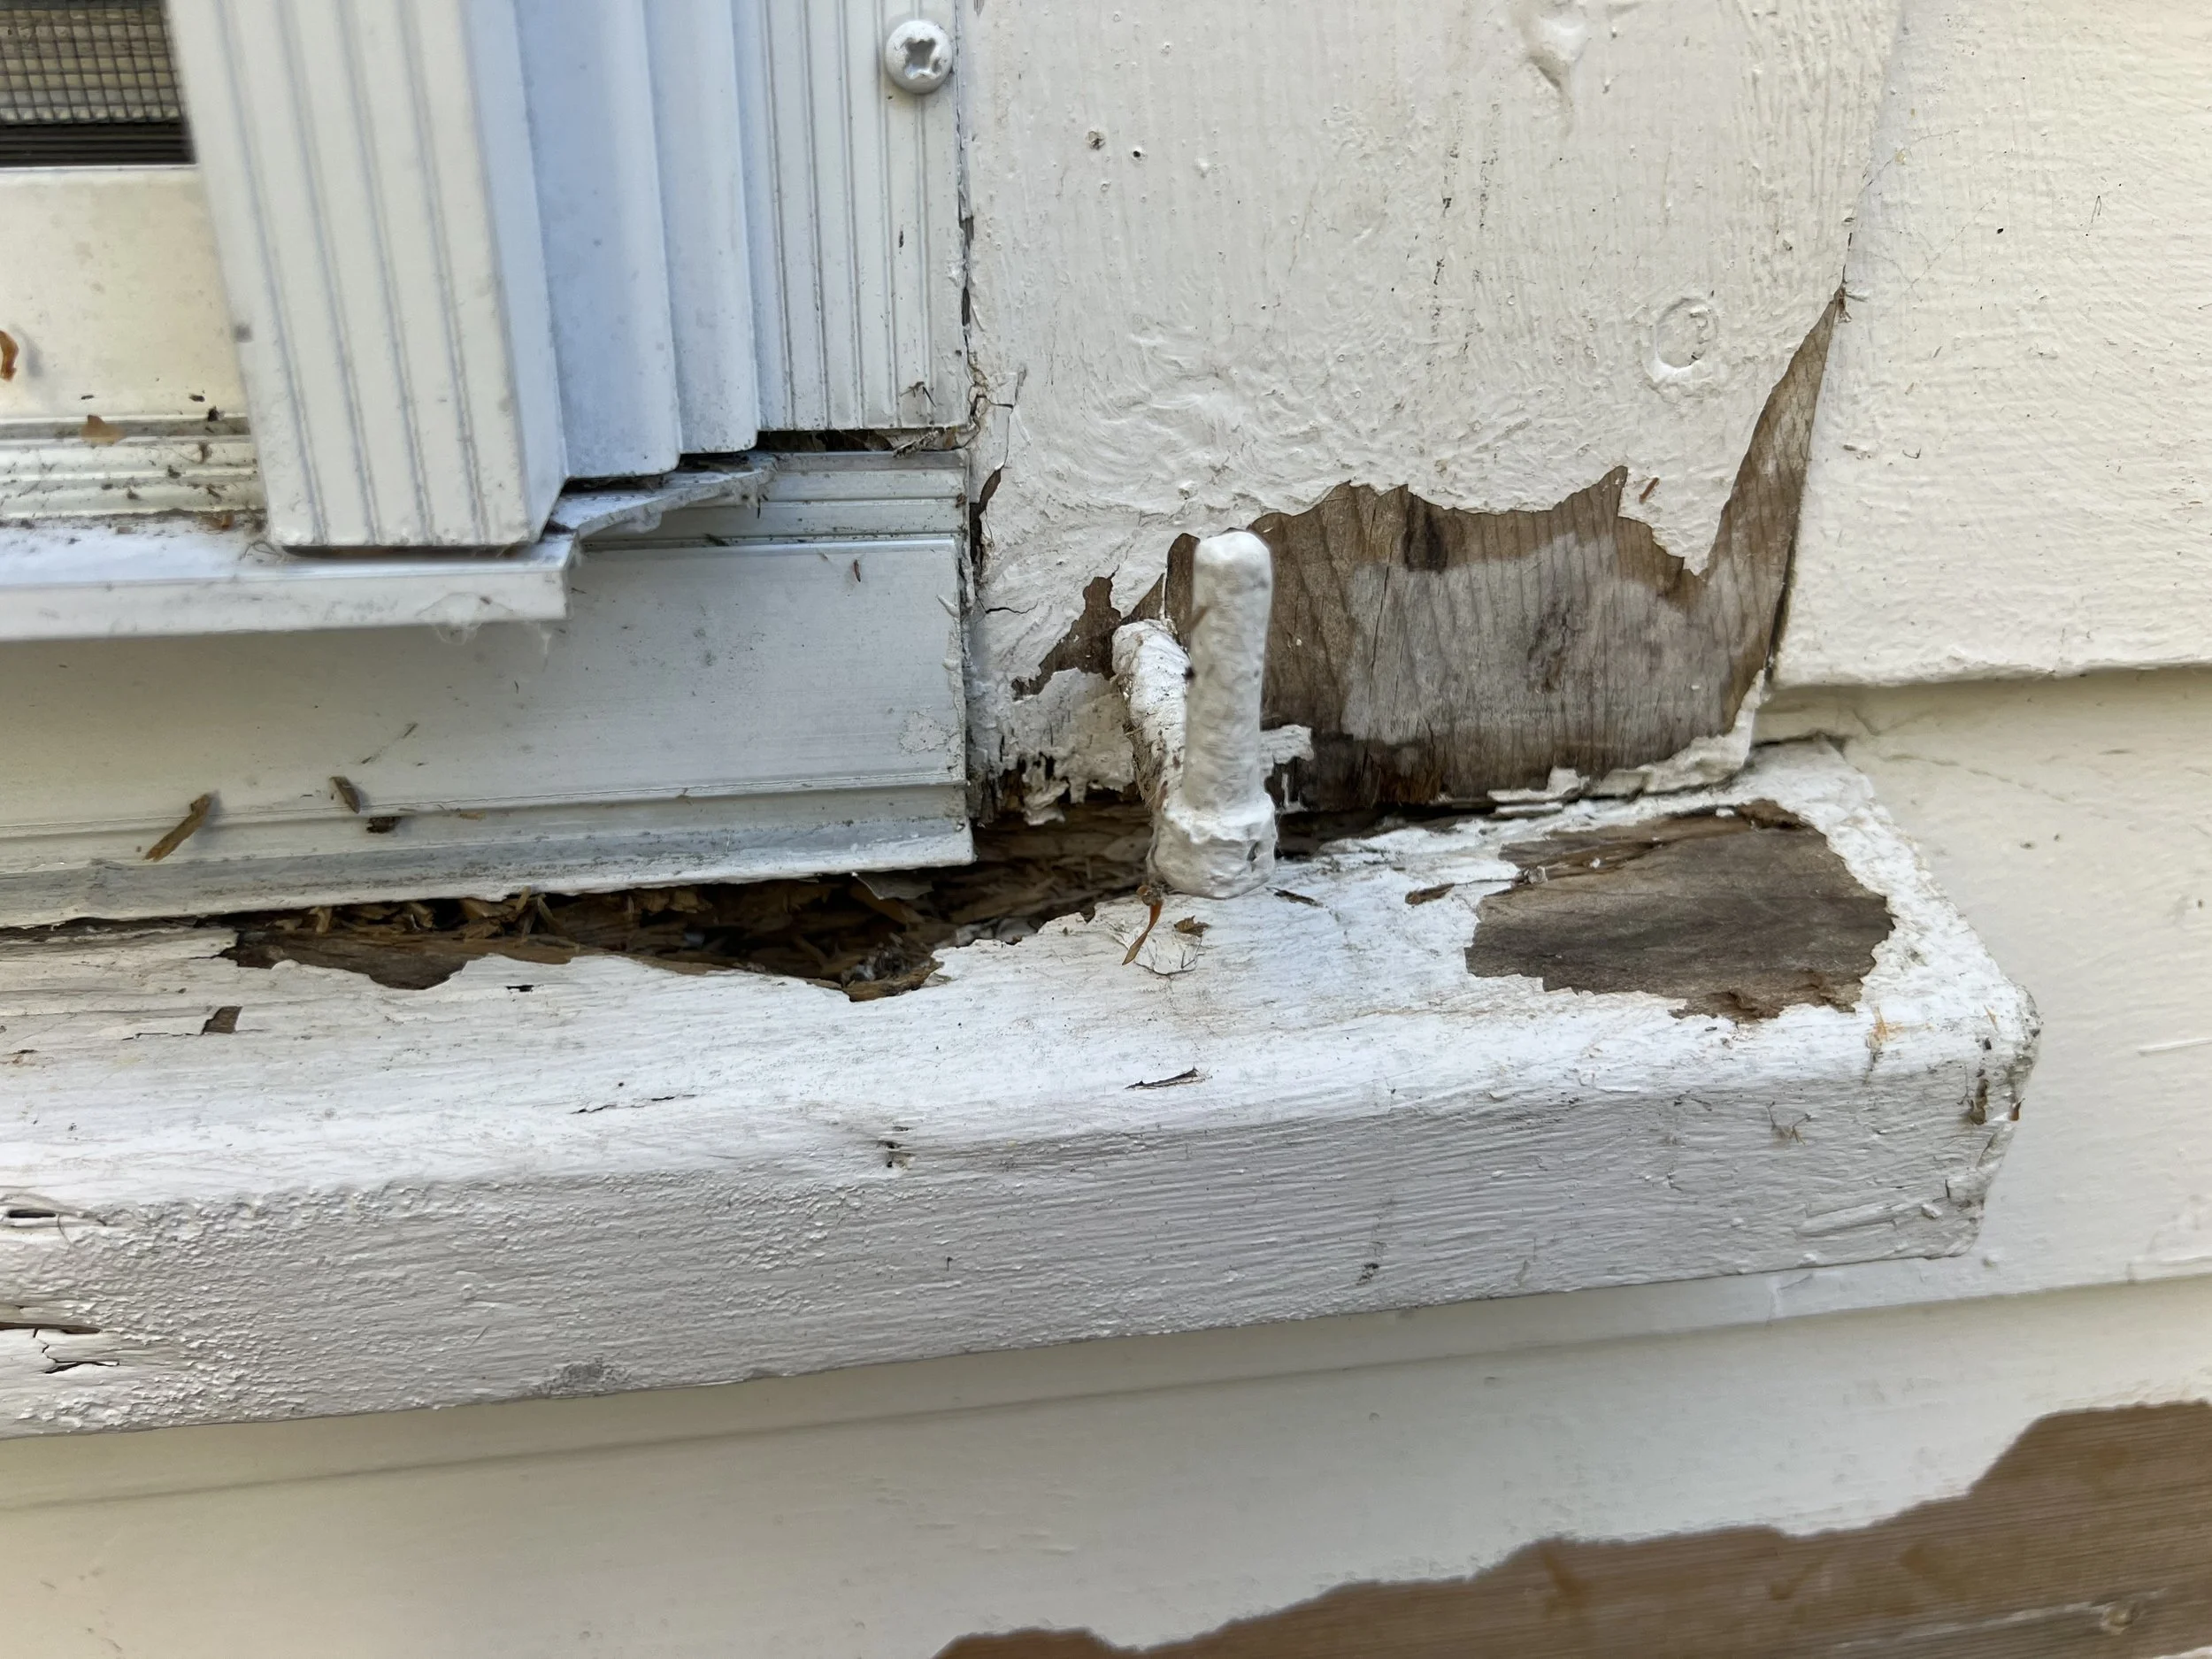
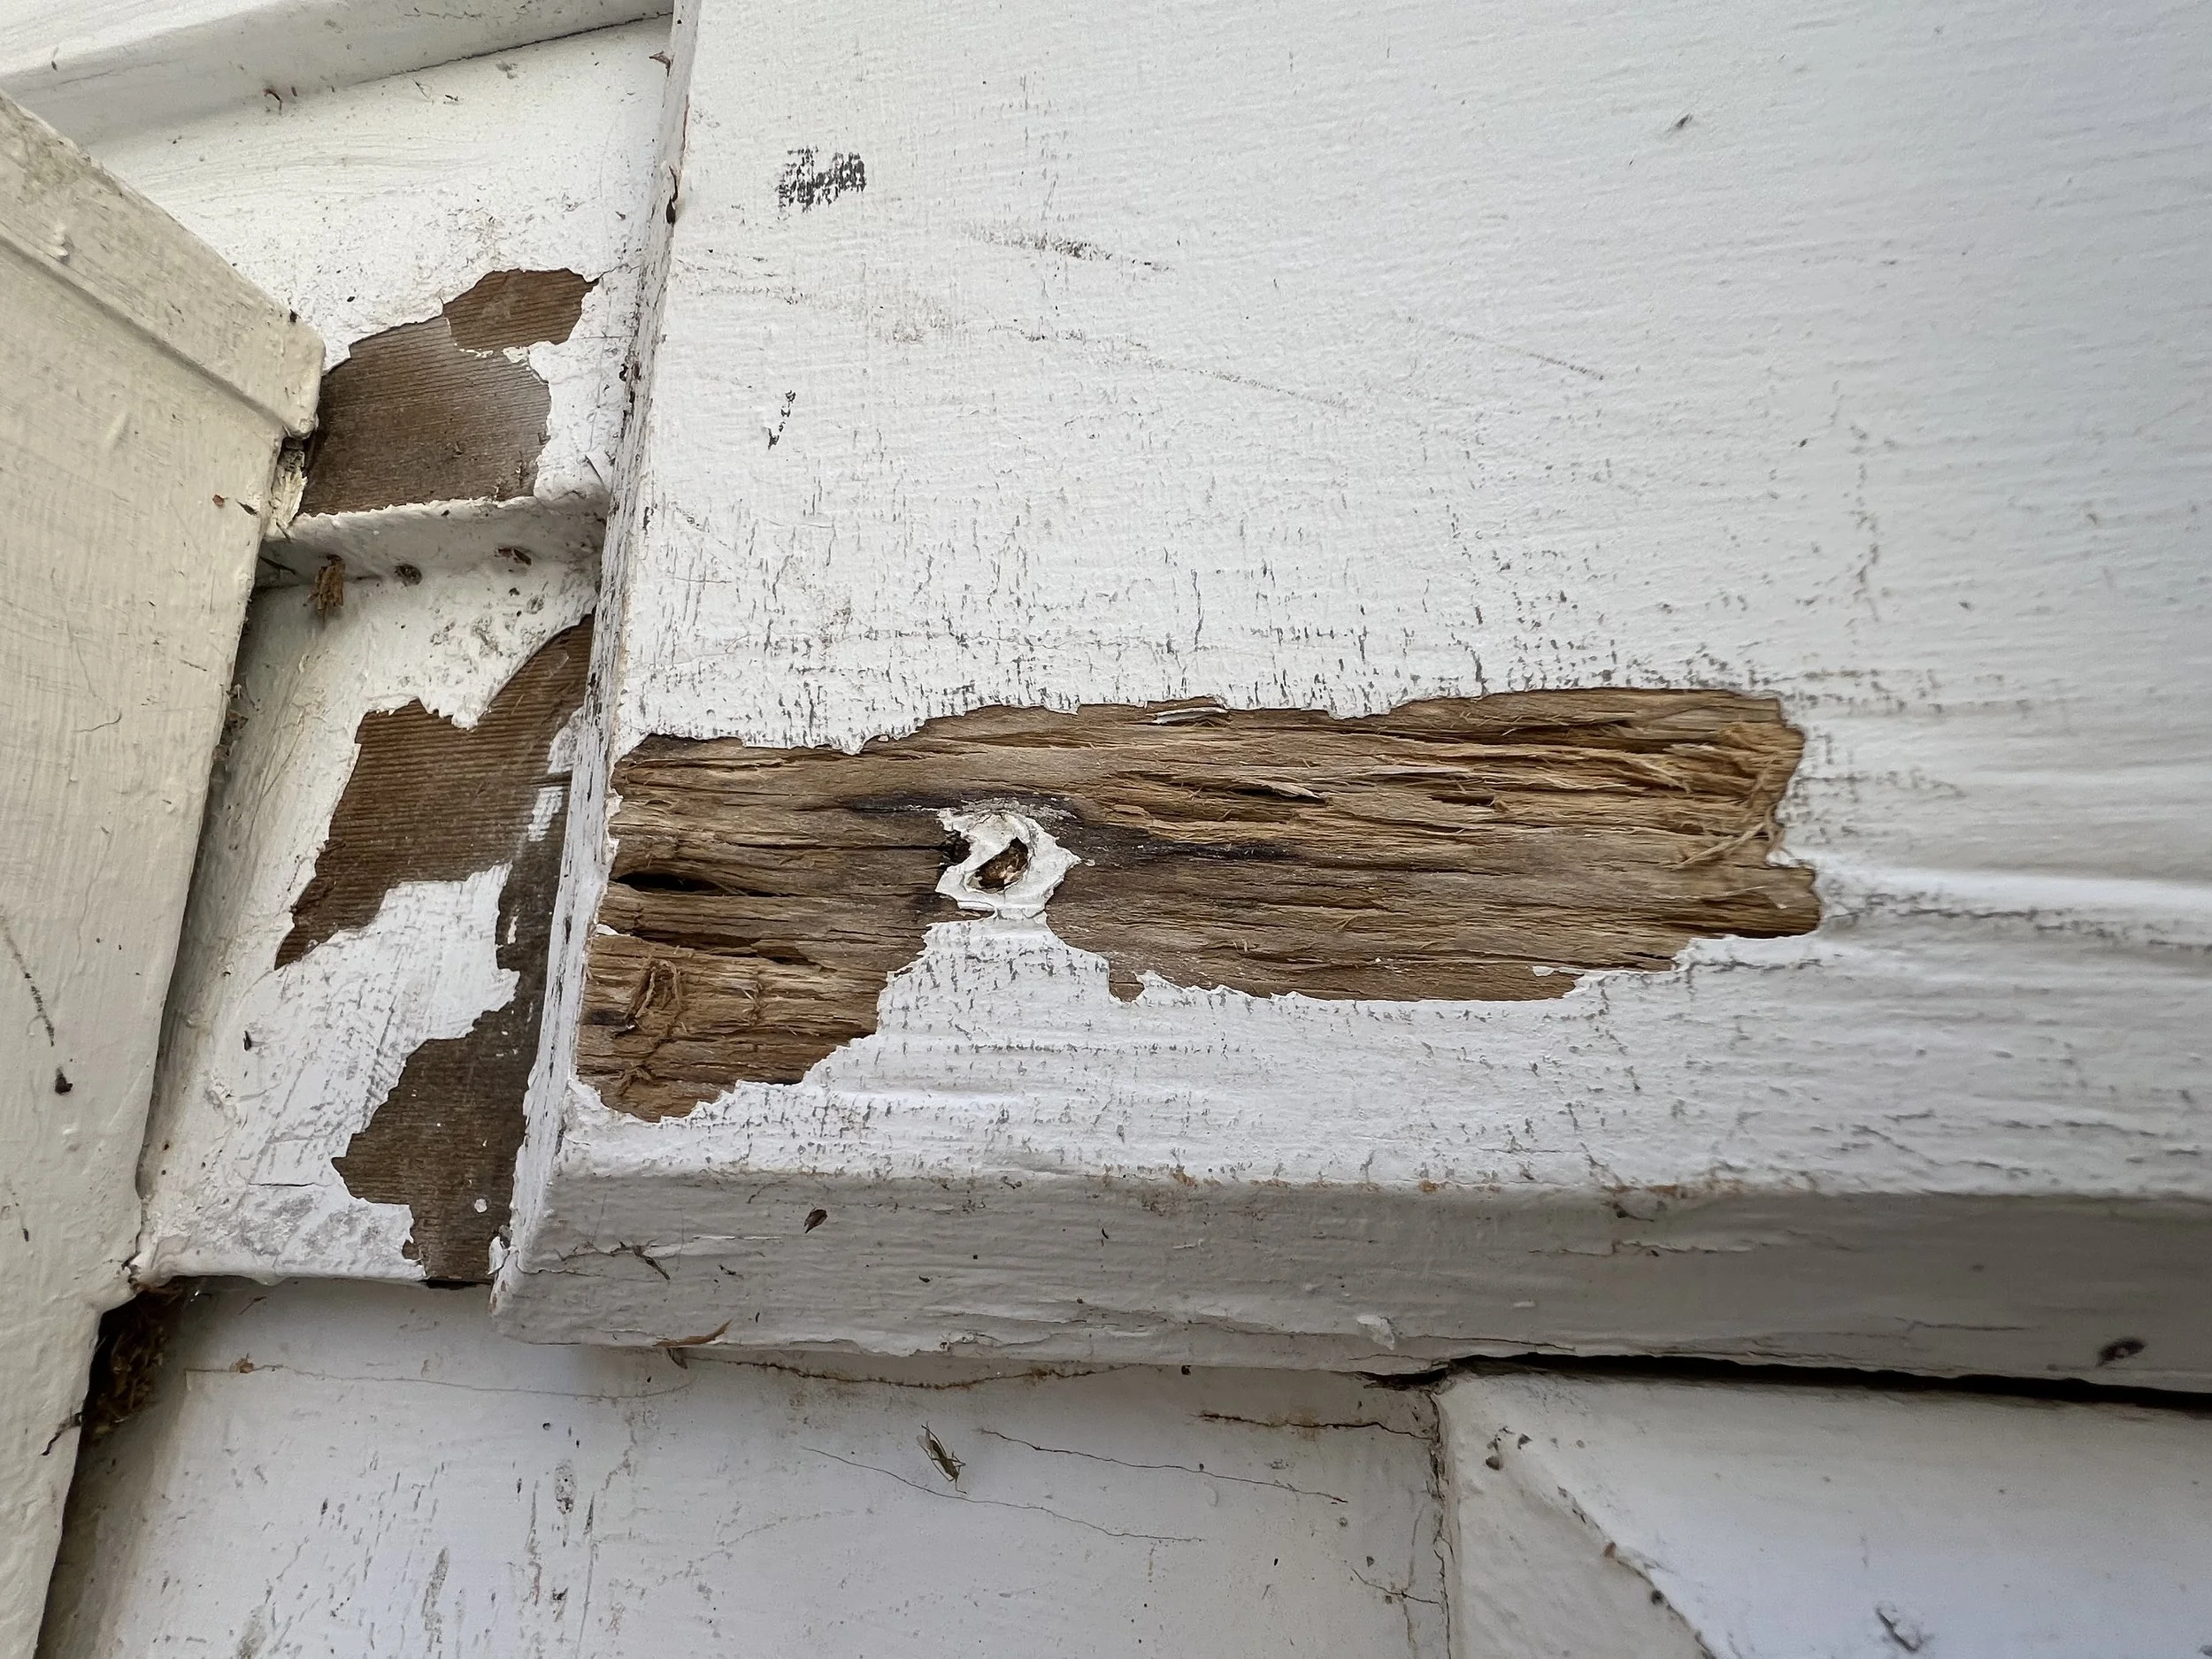
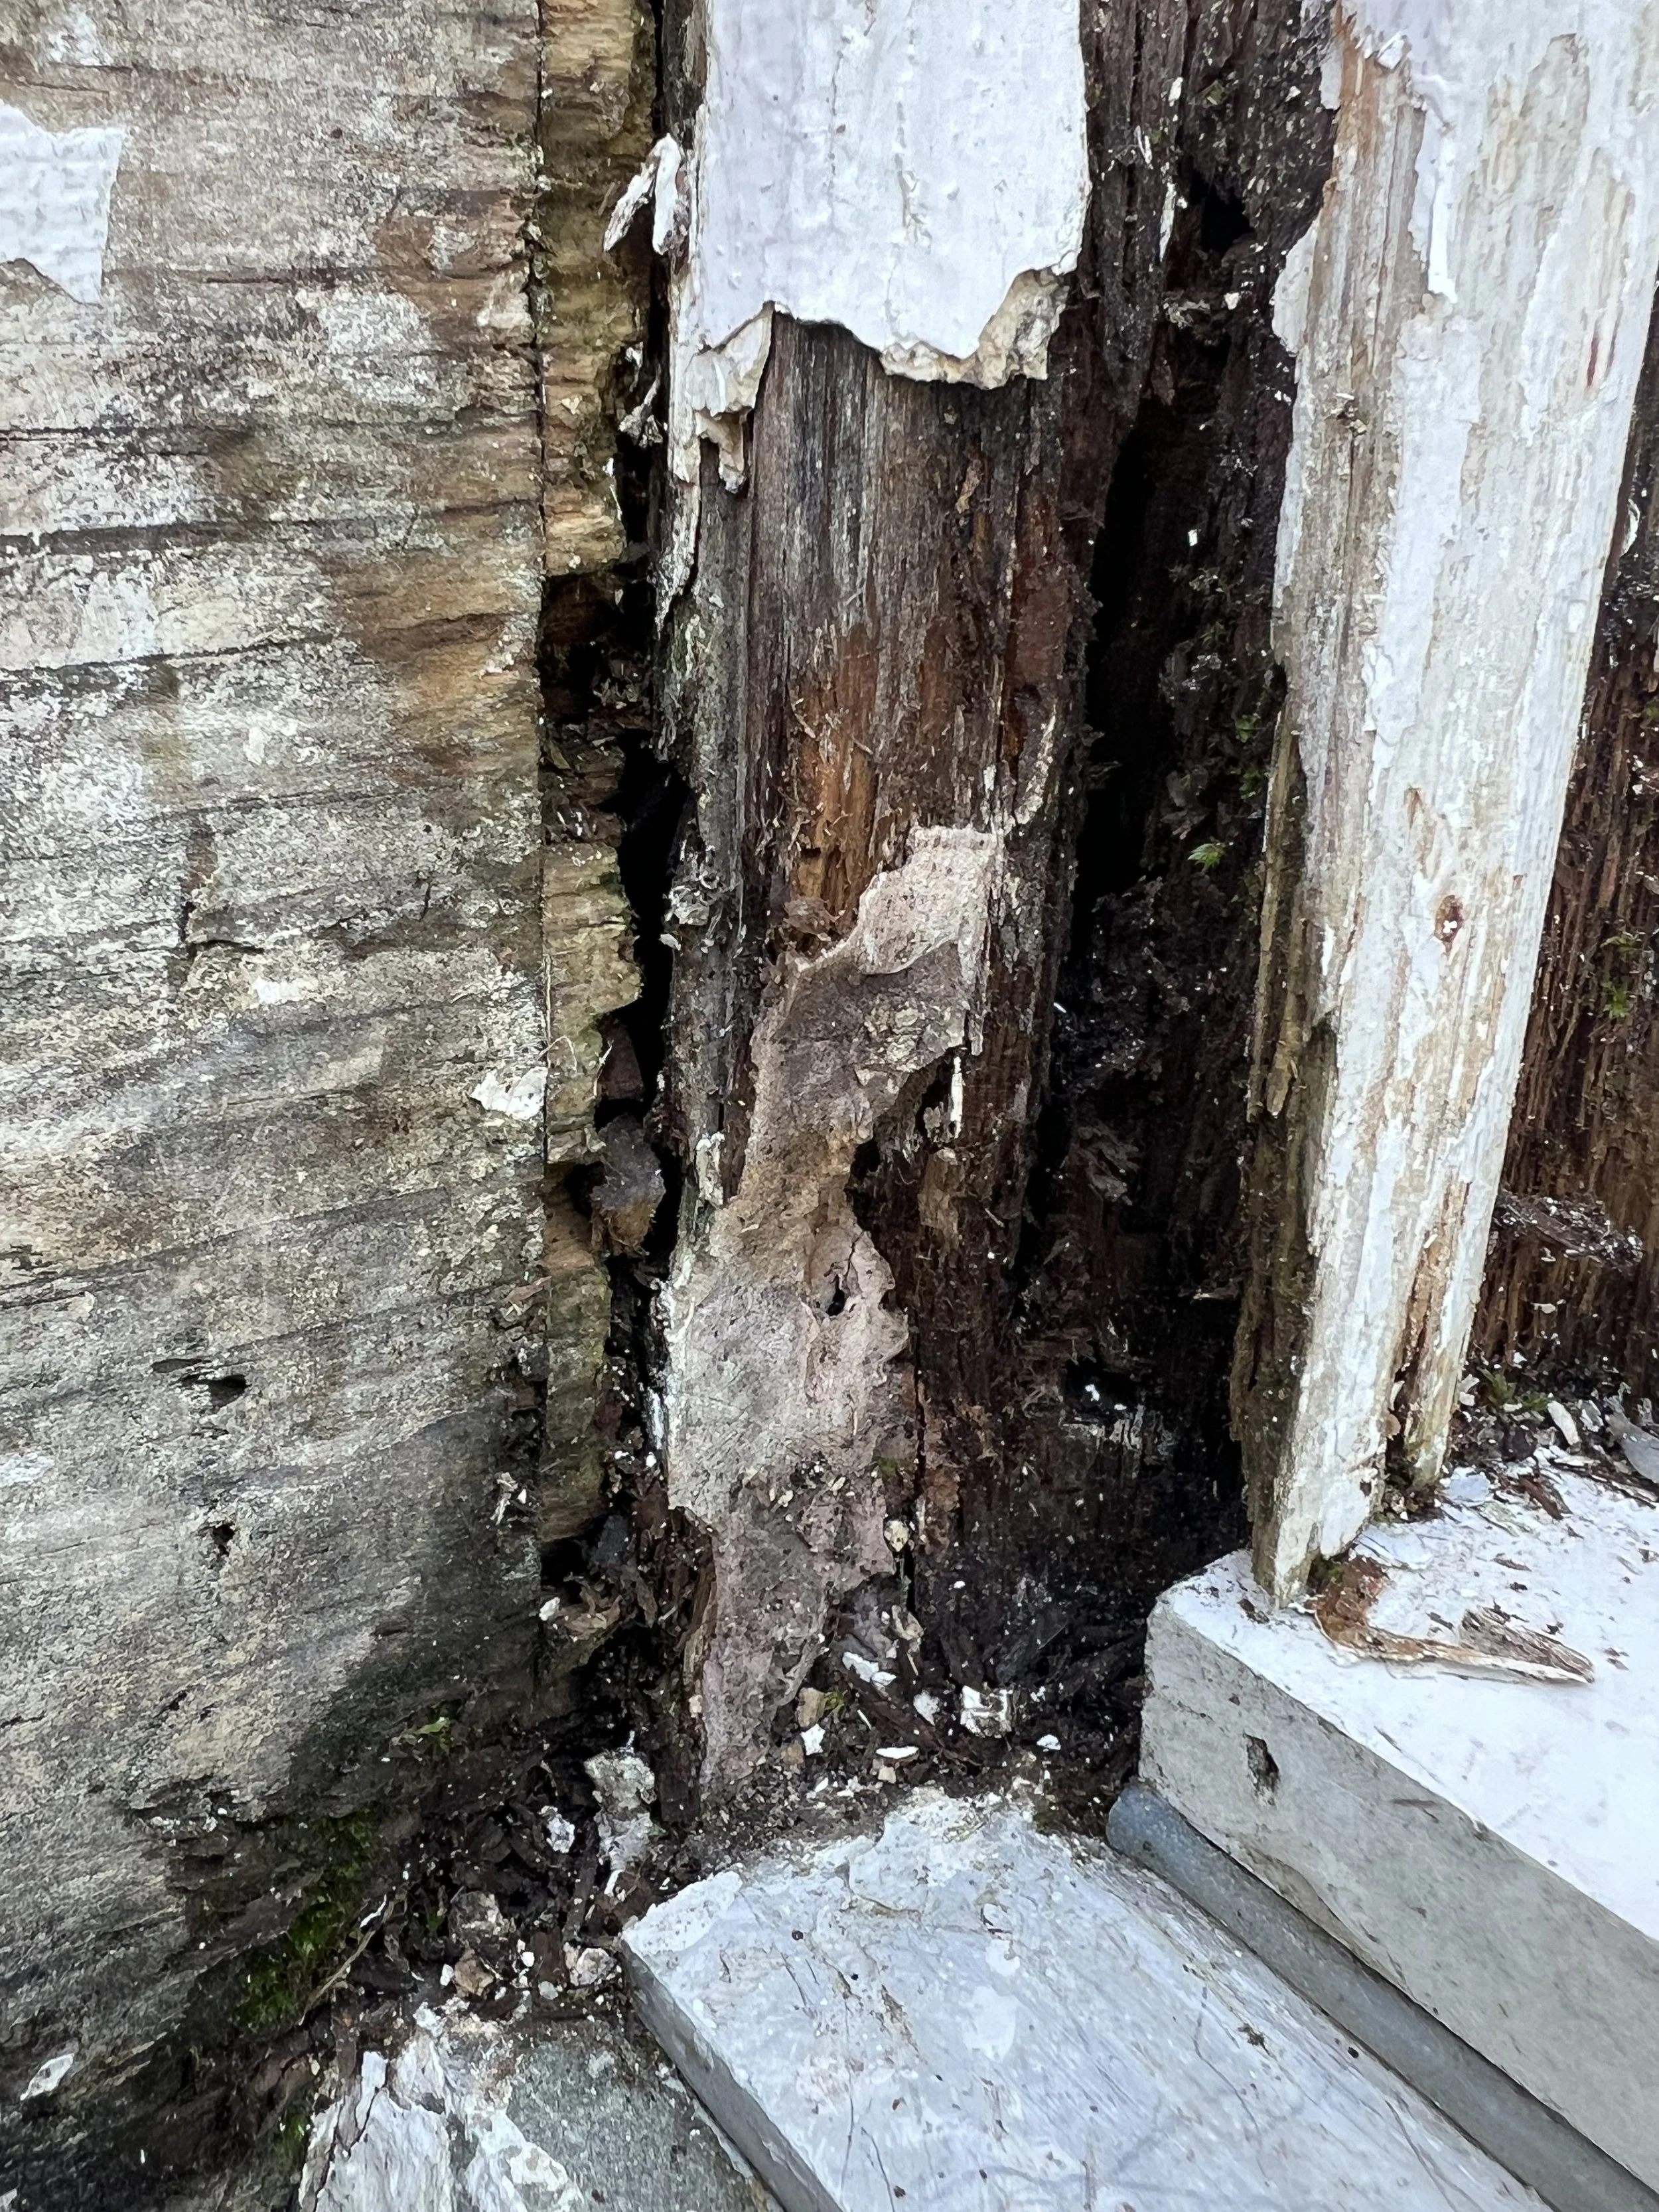
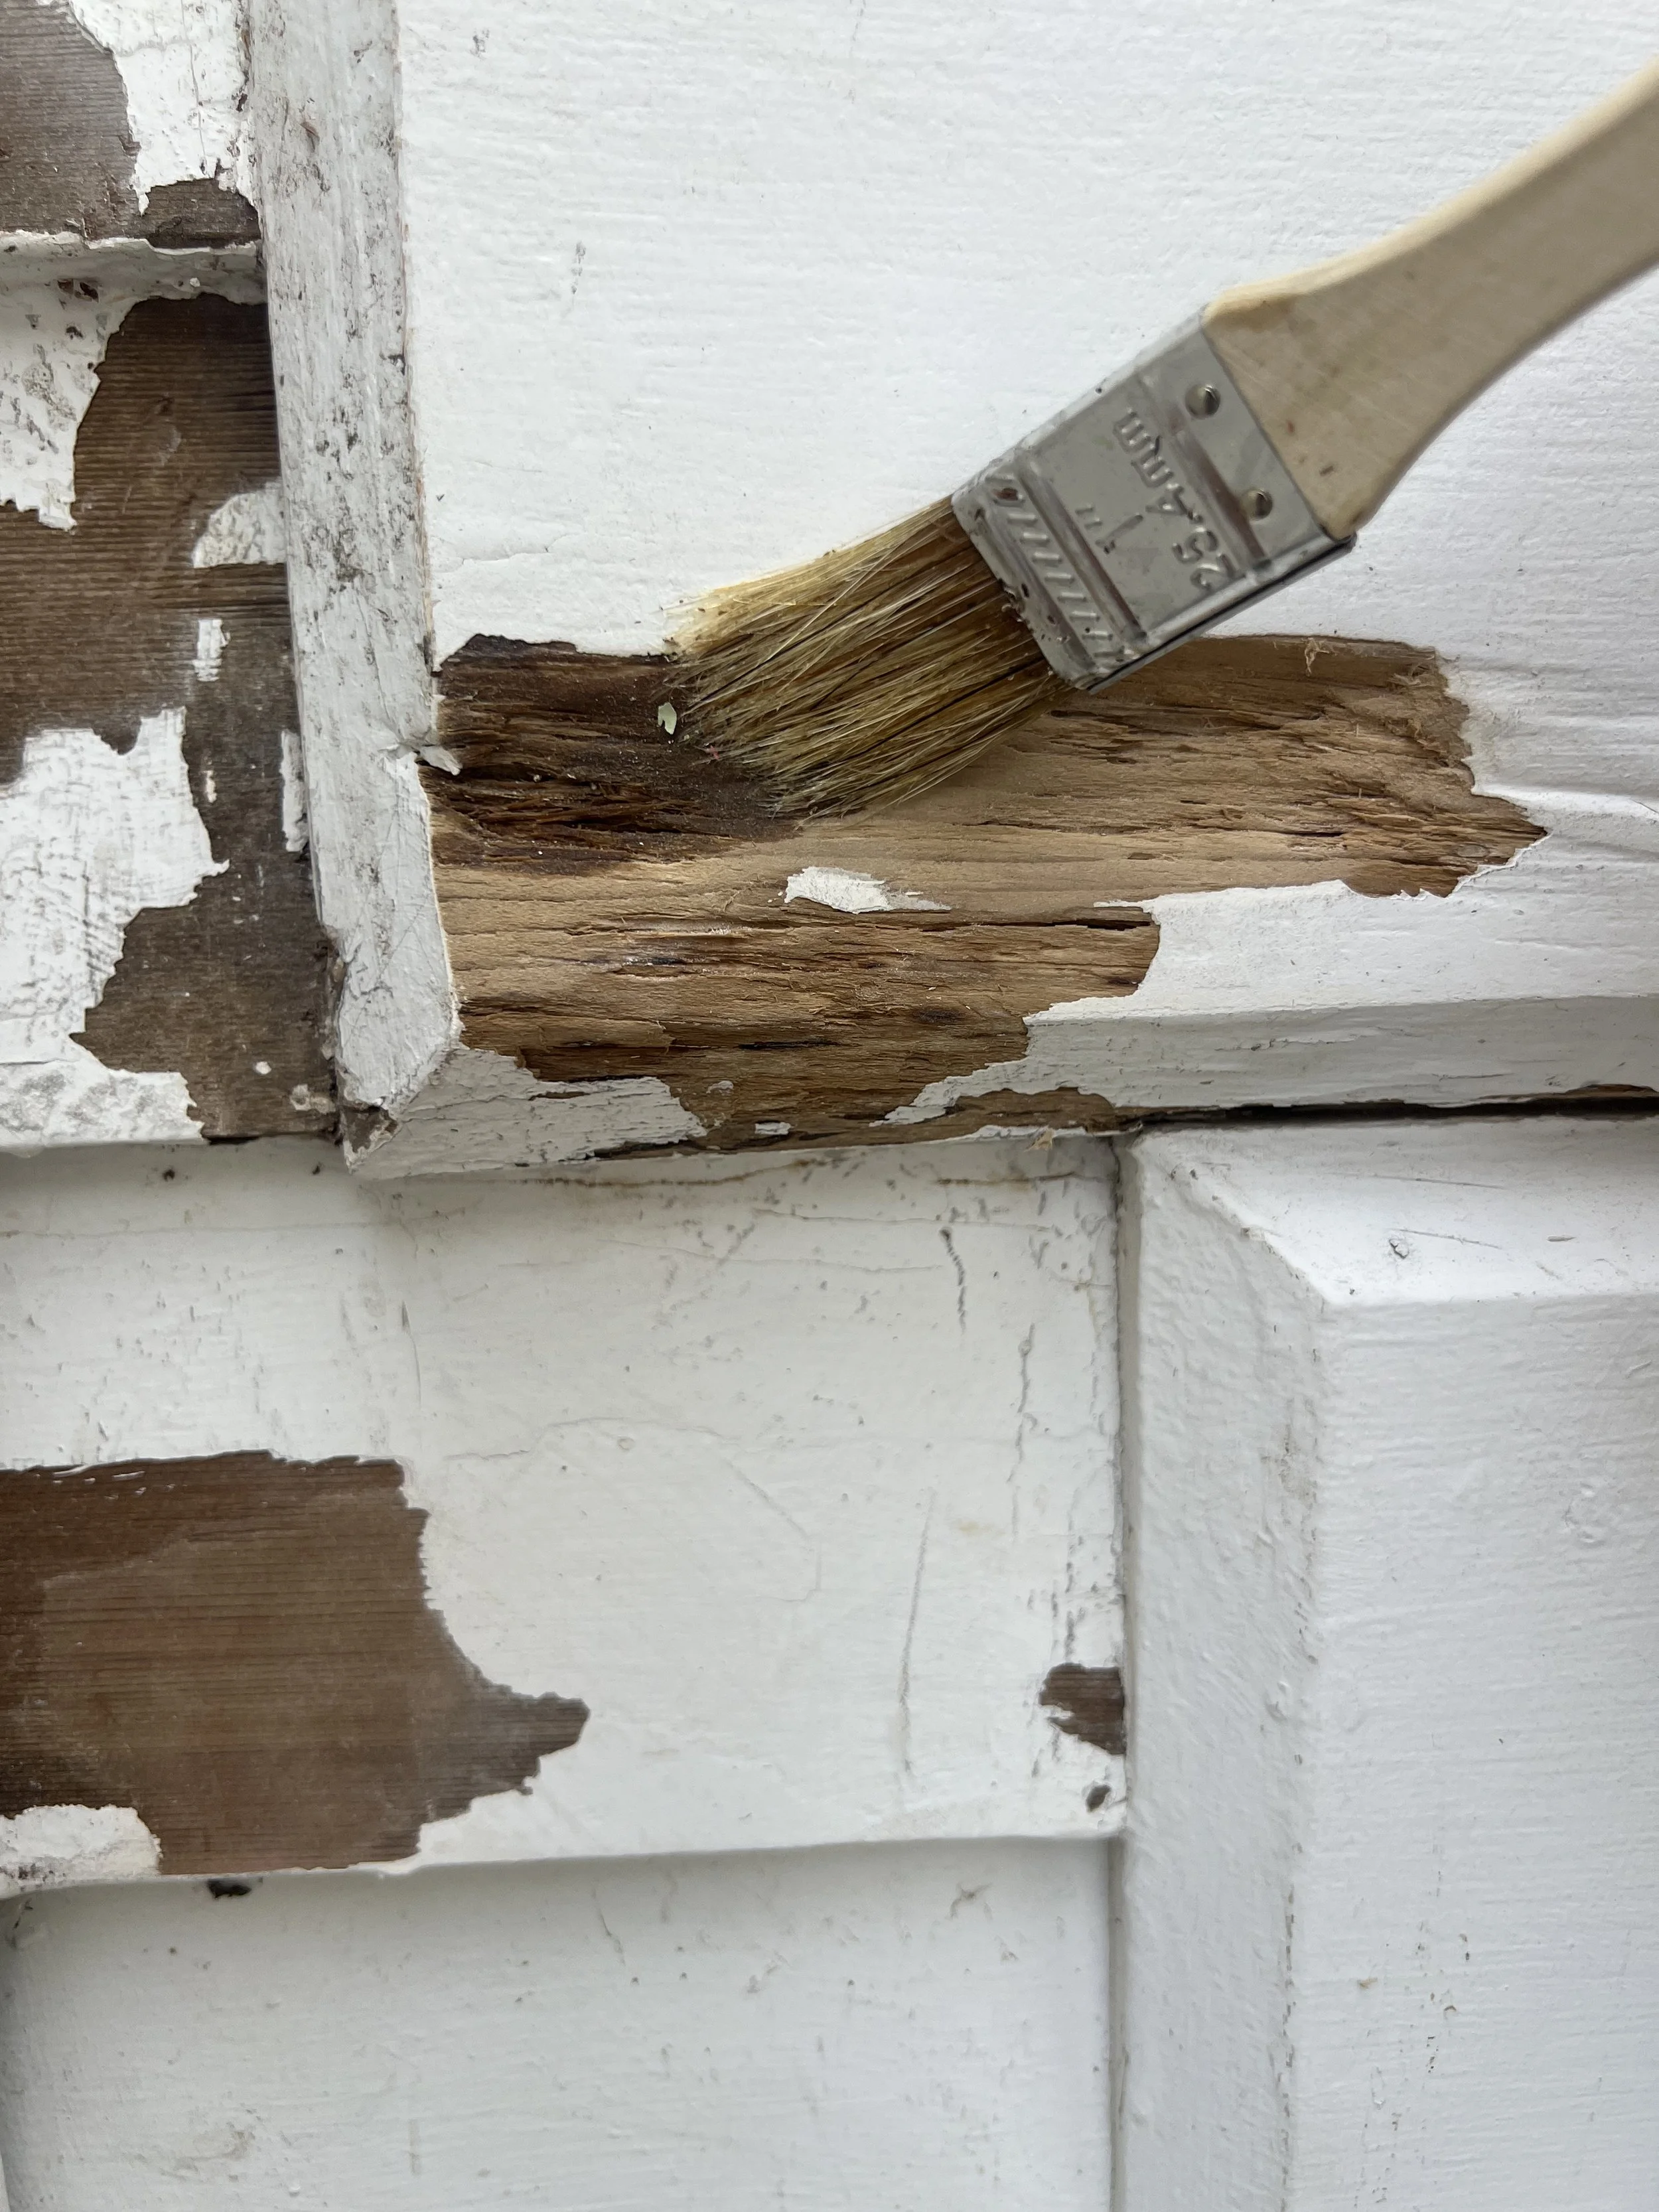
In the worst sections, there wasn’t even wood left to repair—just shape. The paint film itself had become the structural element, holding together what used to be a sill. You could press a finger through it and feel the hollow behind. When you’ve been around boats, you recognize that feeling instantly—the difference between something solid and something pretending to be. Once that illusion’s broken, there’s no unseeing it.
That’s the moment when “we’ll touch this up” turns into “we’re rebuilding.” Every scrape of the blade revealed another hidden failure, another spot where the house had been quietly losing the battle against time and moisture. It was equal parts discouraging and clarifying. The rot wasn’t just decay—it was a record of shortcuts, quick fixes, and good intentions gone bad. And once you see it, there’s really no turning back.
Lessons Learned
It’s easy to get frustrated when you uncover this kind of damage. You start out thinking you’re doing maintenance, and end up doing archaeology—peeling back decades of decisions made by other hands. Somewhere along the line, someone looked at the same spot and thought, “good enough.” Maybe they were out of time or money, or maybe they just didn’t know what was happening under the surface. A bit of caulk here, a coat of paint there—it probably even looked fine for a while.
But water doesn’t care about appearances. It creeps, slowly and methodically, until what’s solid becomes soft, and what’s soft becomes void. The hardest lesson in all this is how invisible the early signs can be. By the time you see a problem, it’s often been there for years. The smallest hairline crack, the slightest failed seam, can invite enough moisture to start a chain reaction that won’t show itself until it’s too late.
Working through these repairs has made me pay attention differently. I’ve started to notice the small tells—the way paint bubbles slightly where the grain swells, or how a joint line darkens just a touch before it splits. You begin to develop a kind of sixth sense for it. The house starts talking to you, in its own quiet way. It’s less about paranoia and more about awareness: understanding how wood, water, and time all interact.
It’s also taught me to slow down. You can’t rush through rot repair; it’s one of those jobs that demands patience. Every shortcut you take shows up later—sometimes in months, sometimes in years—but it always comes back. If you want the fix to last, you give each step its time: let the stabilizer cure, the filler set, the primer dry. It’s tedious, yes, but there’s something grounding about it too. It’s the kind of work that rewards presence.
And maybe that’s the deeper takeaway. These old houses don’t just need upkeep—they need stewardship. They require you to understand their flaws, forgive their quirks, and meet them where they are. You can’t fake it with a coat of paint. You earn their longevity the same way you earn trust in anything living: by showing up, doing the work, and taking the time to do it right.

The Process
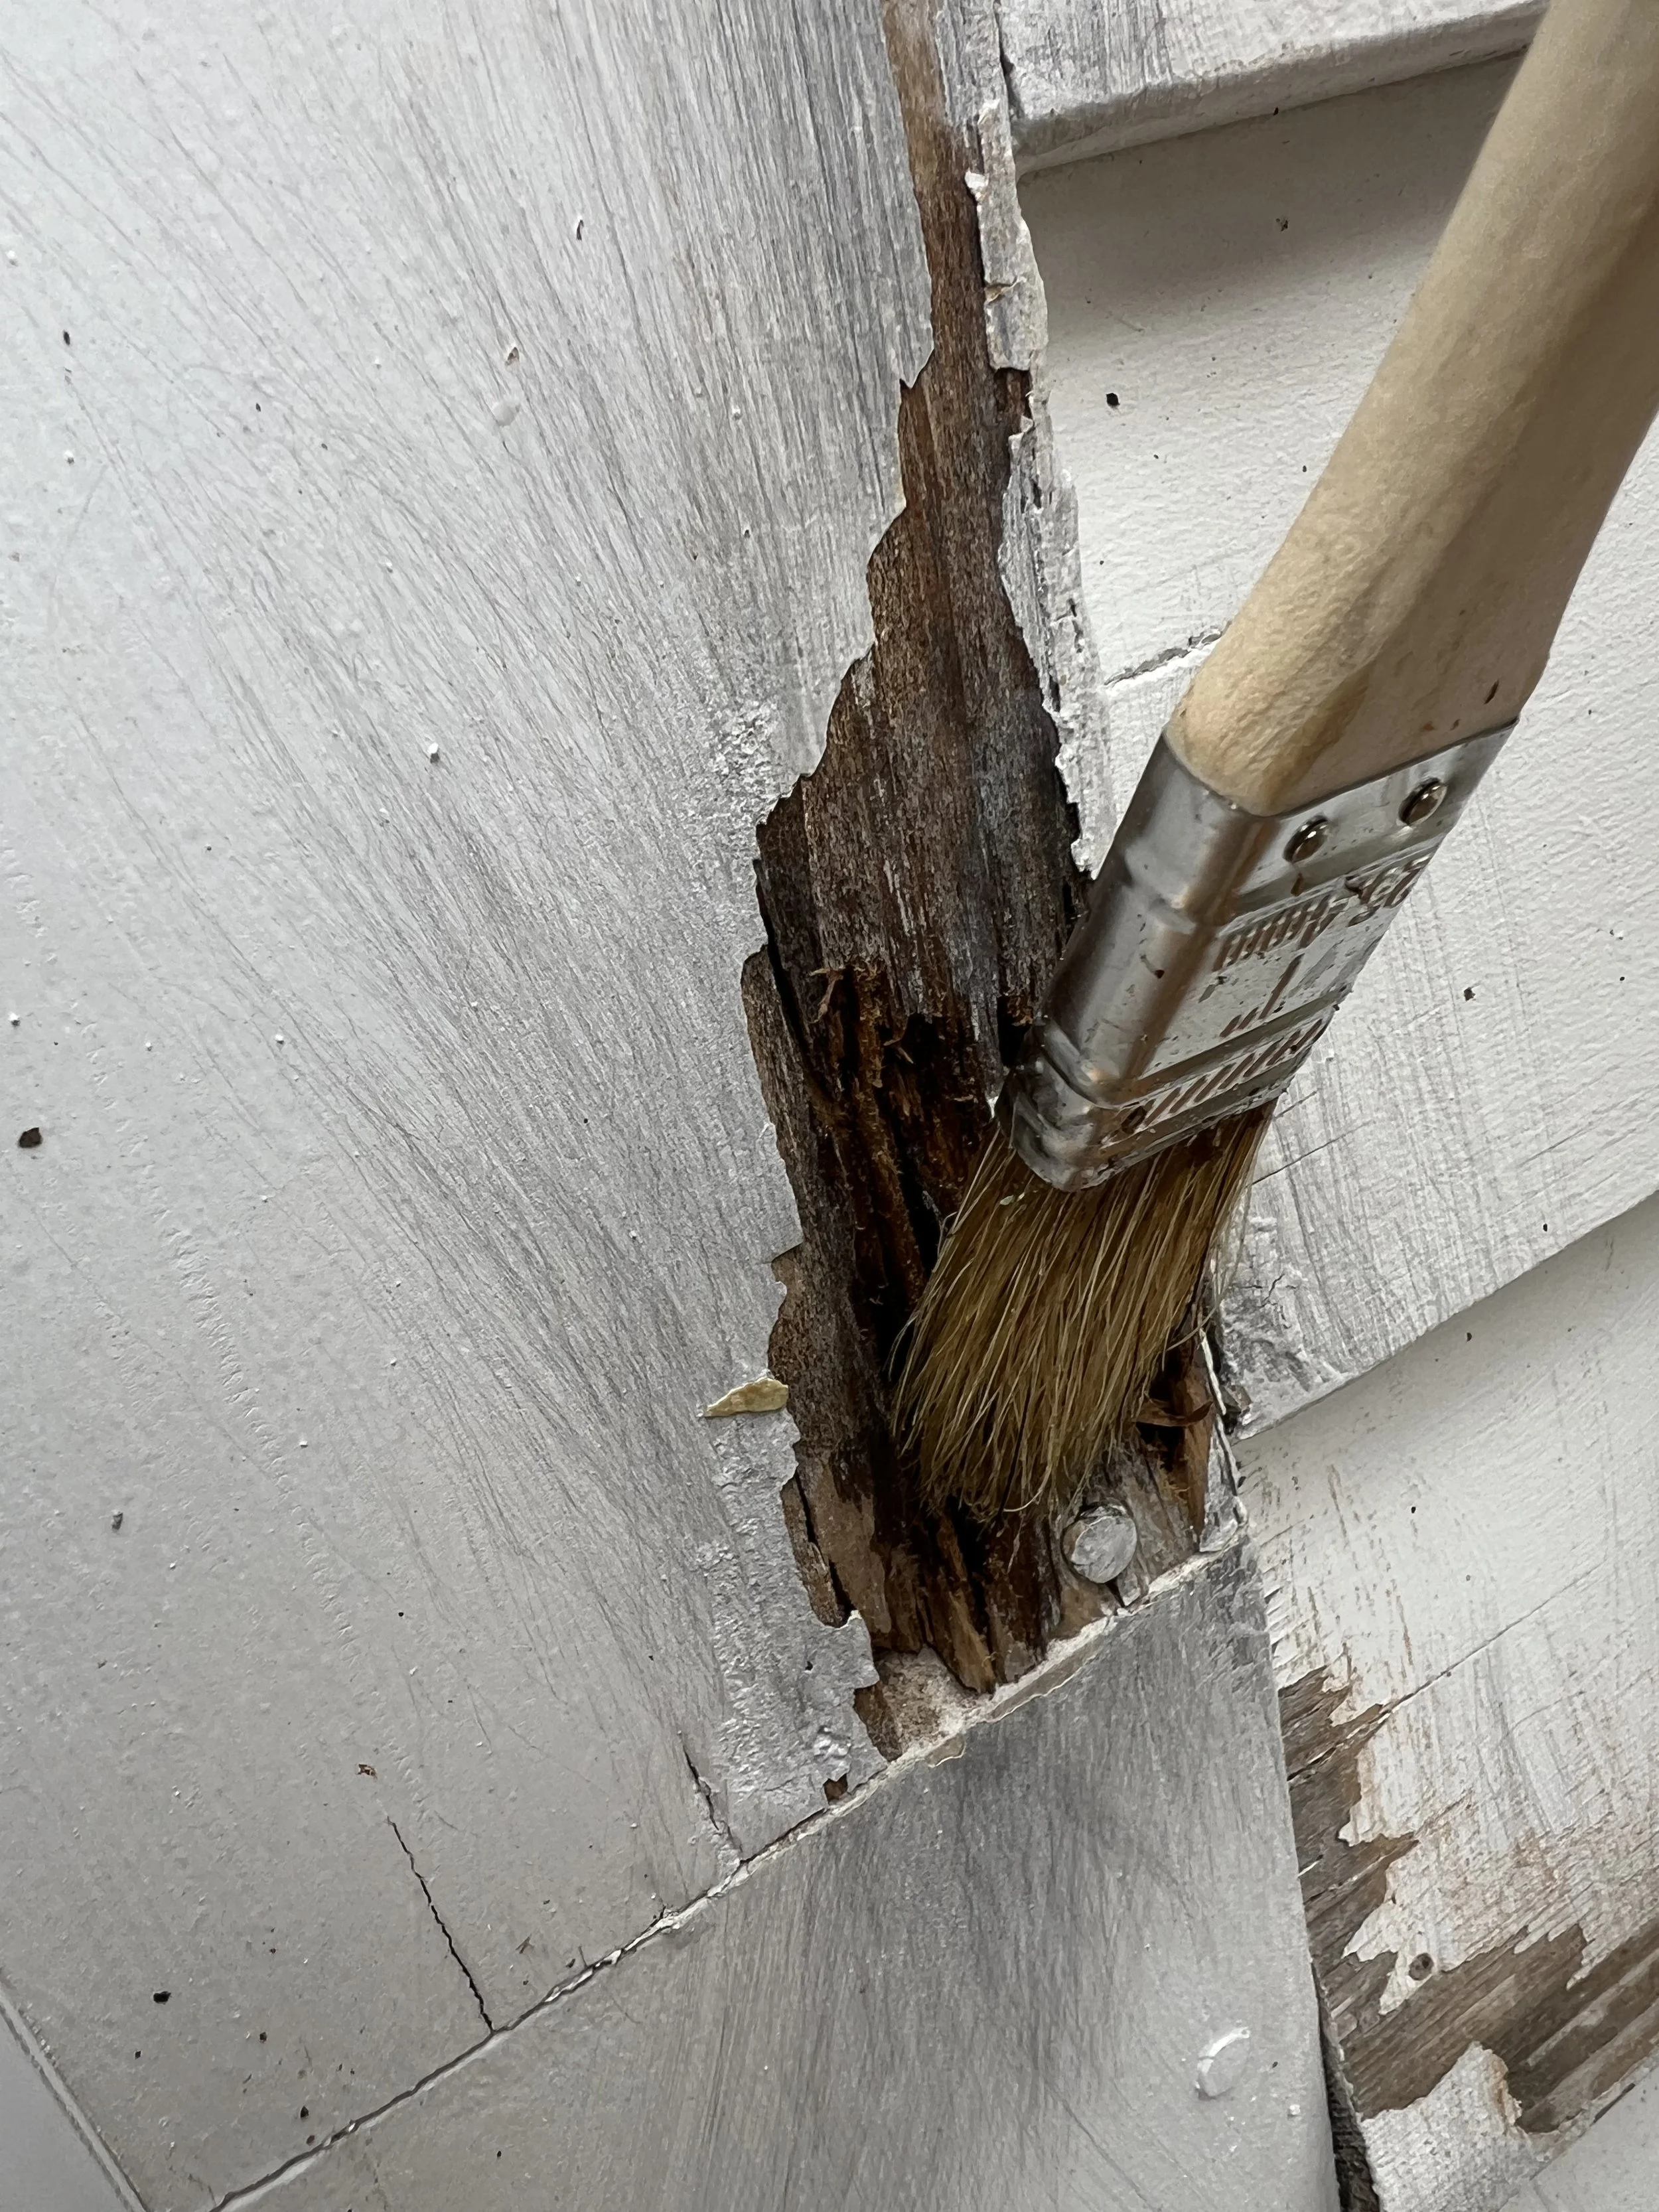
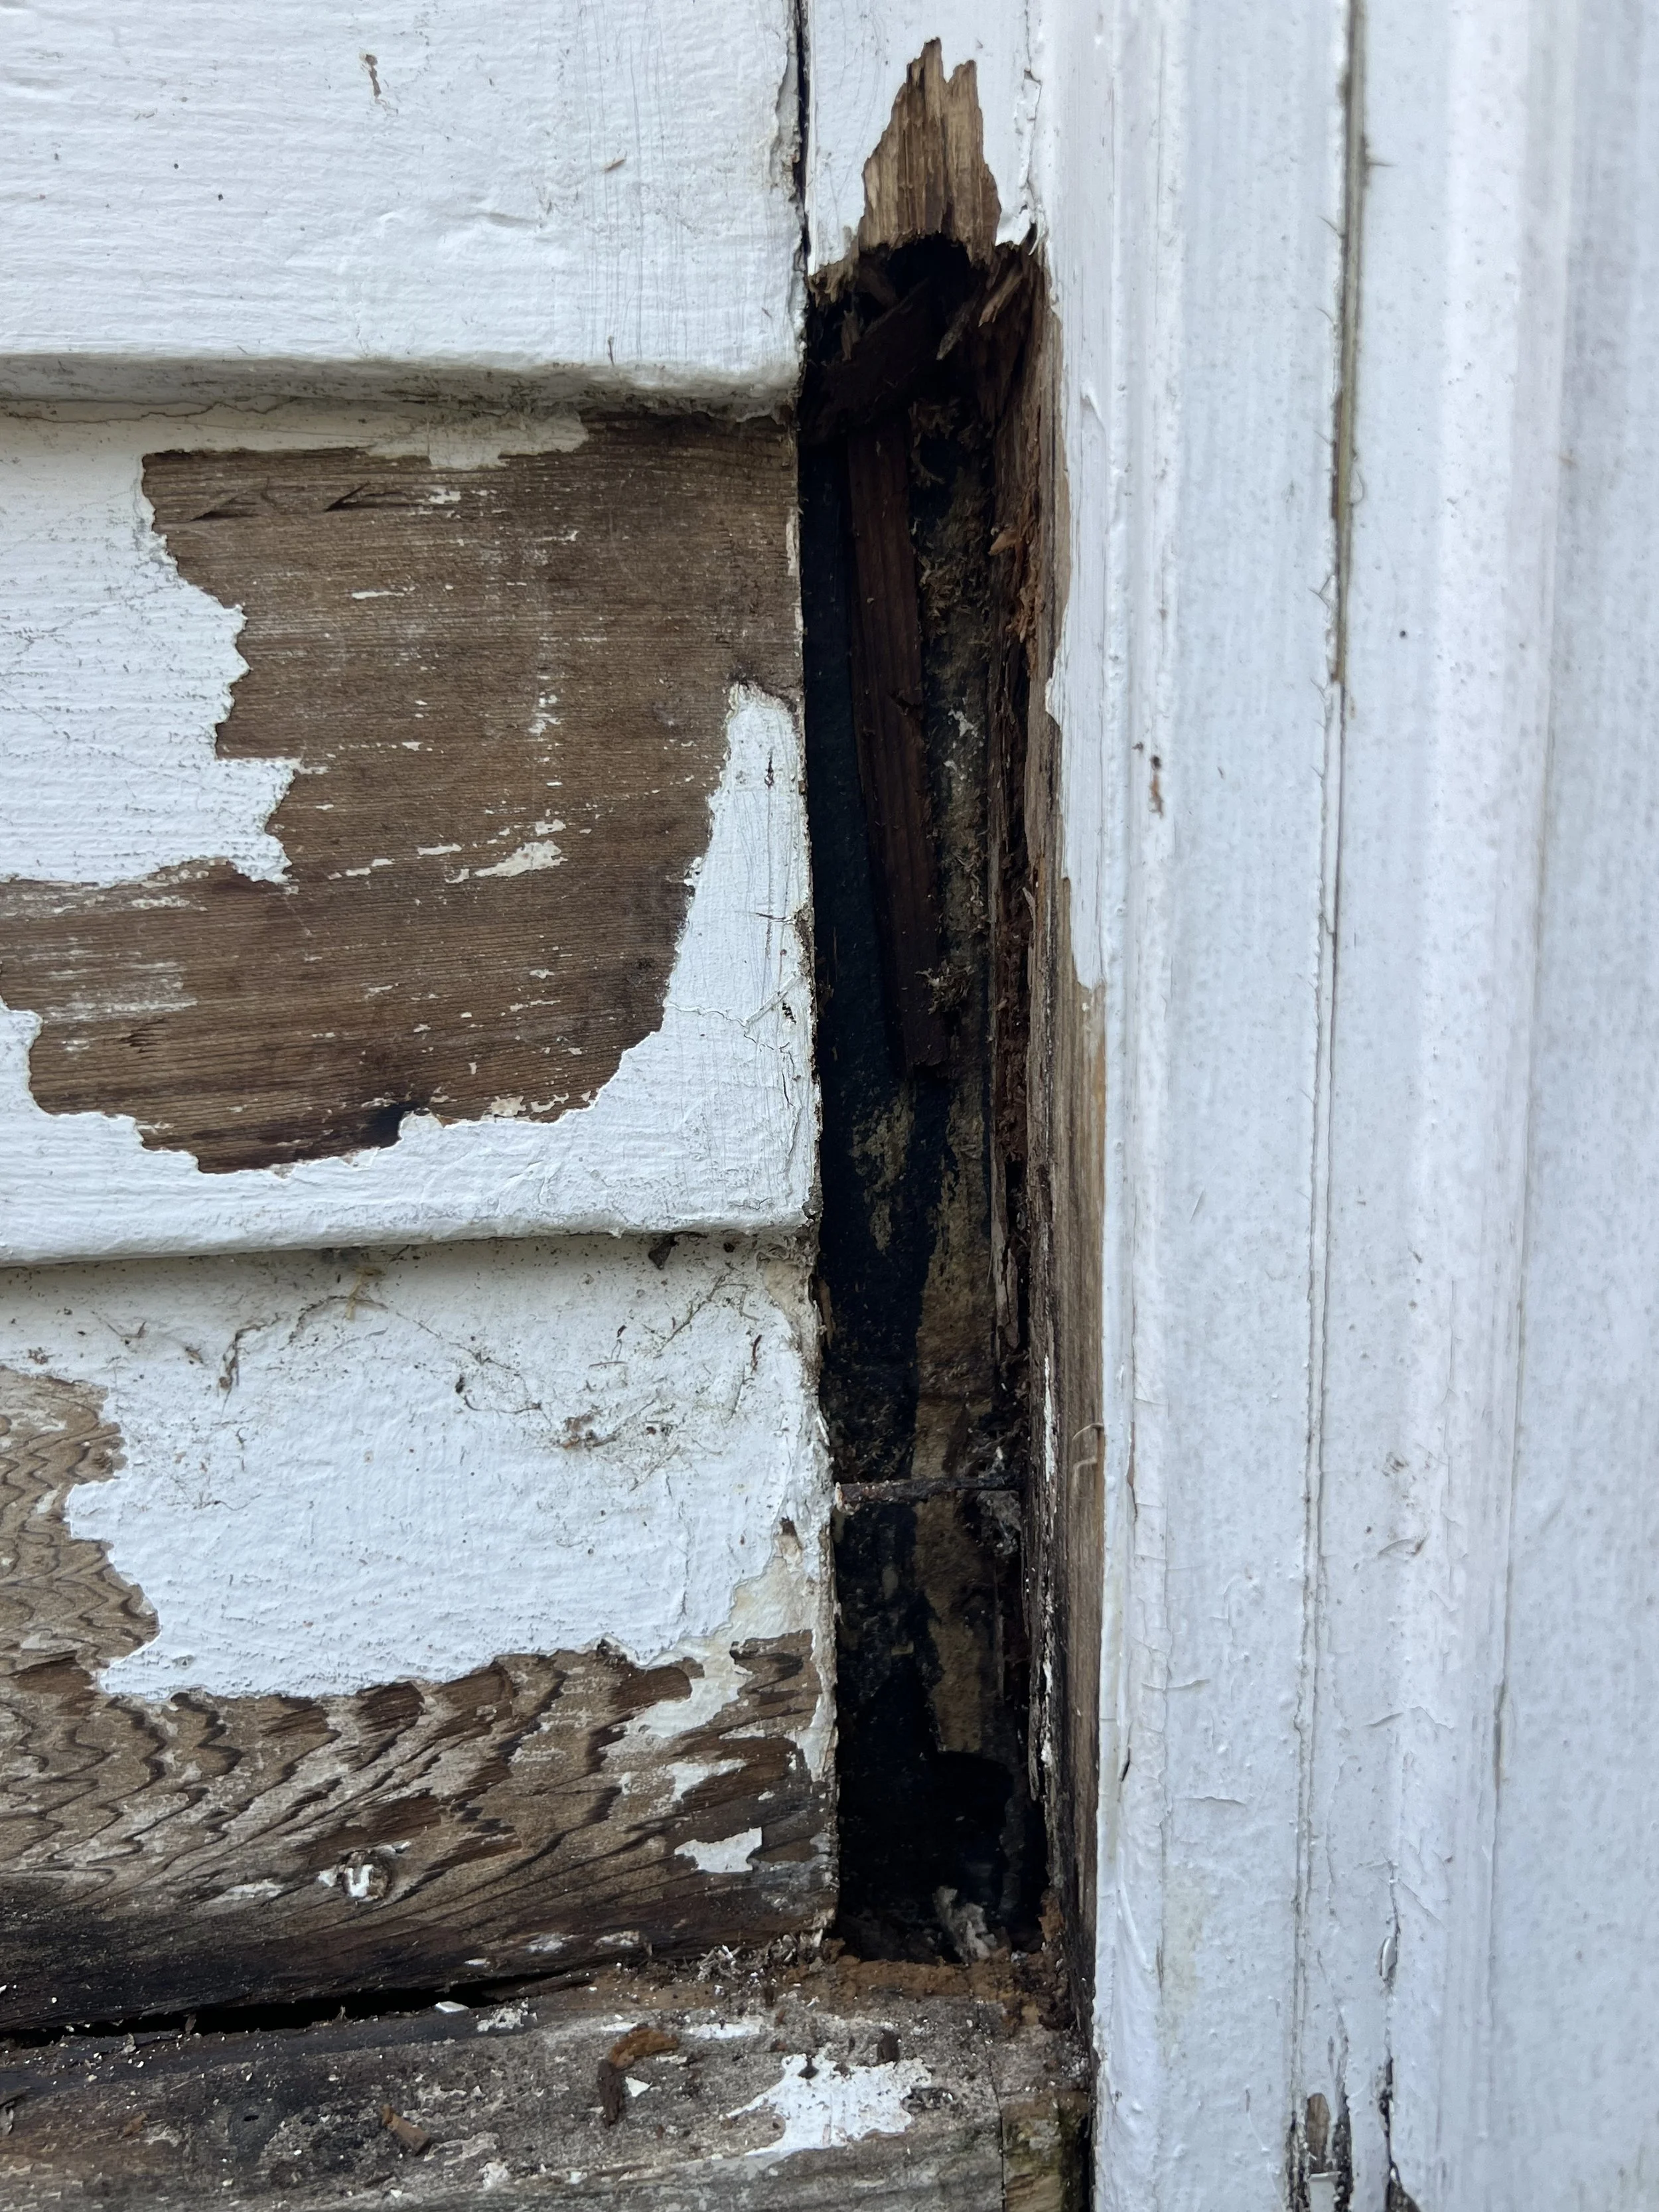
Once I realized how deep the damage went, the work shifted from “touch-up” to “surgery.” The first step was excavation; scraping out every bit of soft, punky wood until I hit something that still had structure. Sometimes that meant a few inches of material; other times, half a sill disappeared before I reached anything solid. It’s one of those jobs that punishes optimism—you think you’re done, and the tool sinks in another inch.
The Rigid oscillating multi-tool became the MVP of this phase. Its precision and control made it possible to open up clean, squared-off cavities instead of jagged holes. The goal was to create stable geometry to splice into later—something that wouldn’t just look patched, but actually tie back into the structure. Each cavity had its own personality: some deep and narrow, some sprawling across seams where trim and siding met. Every cut revealed another little truth about how the house was originally built—and how it had been neglected since.
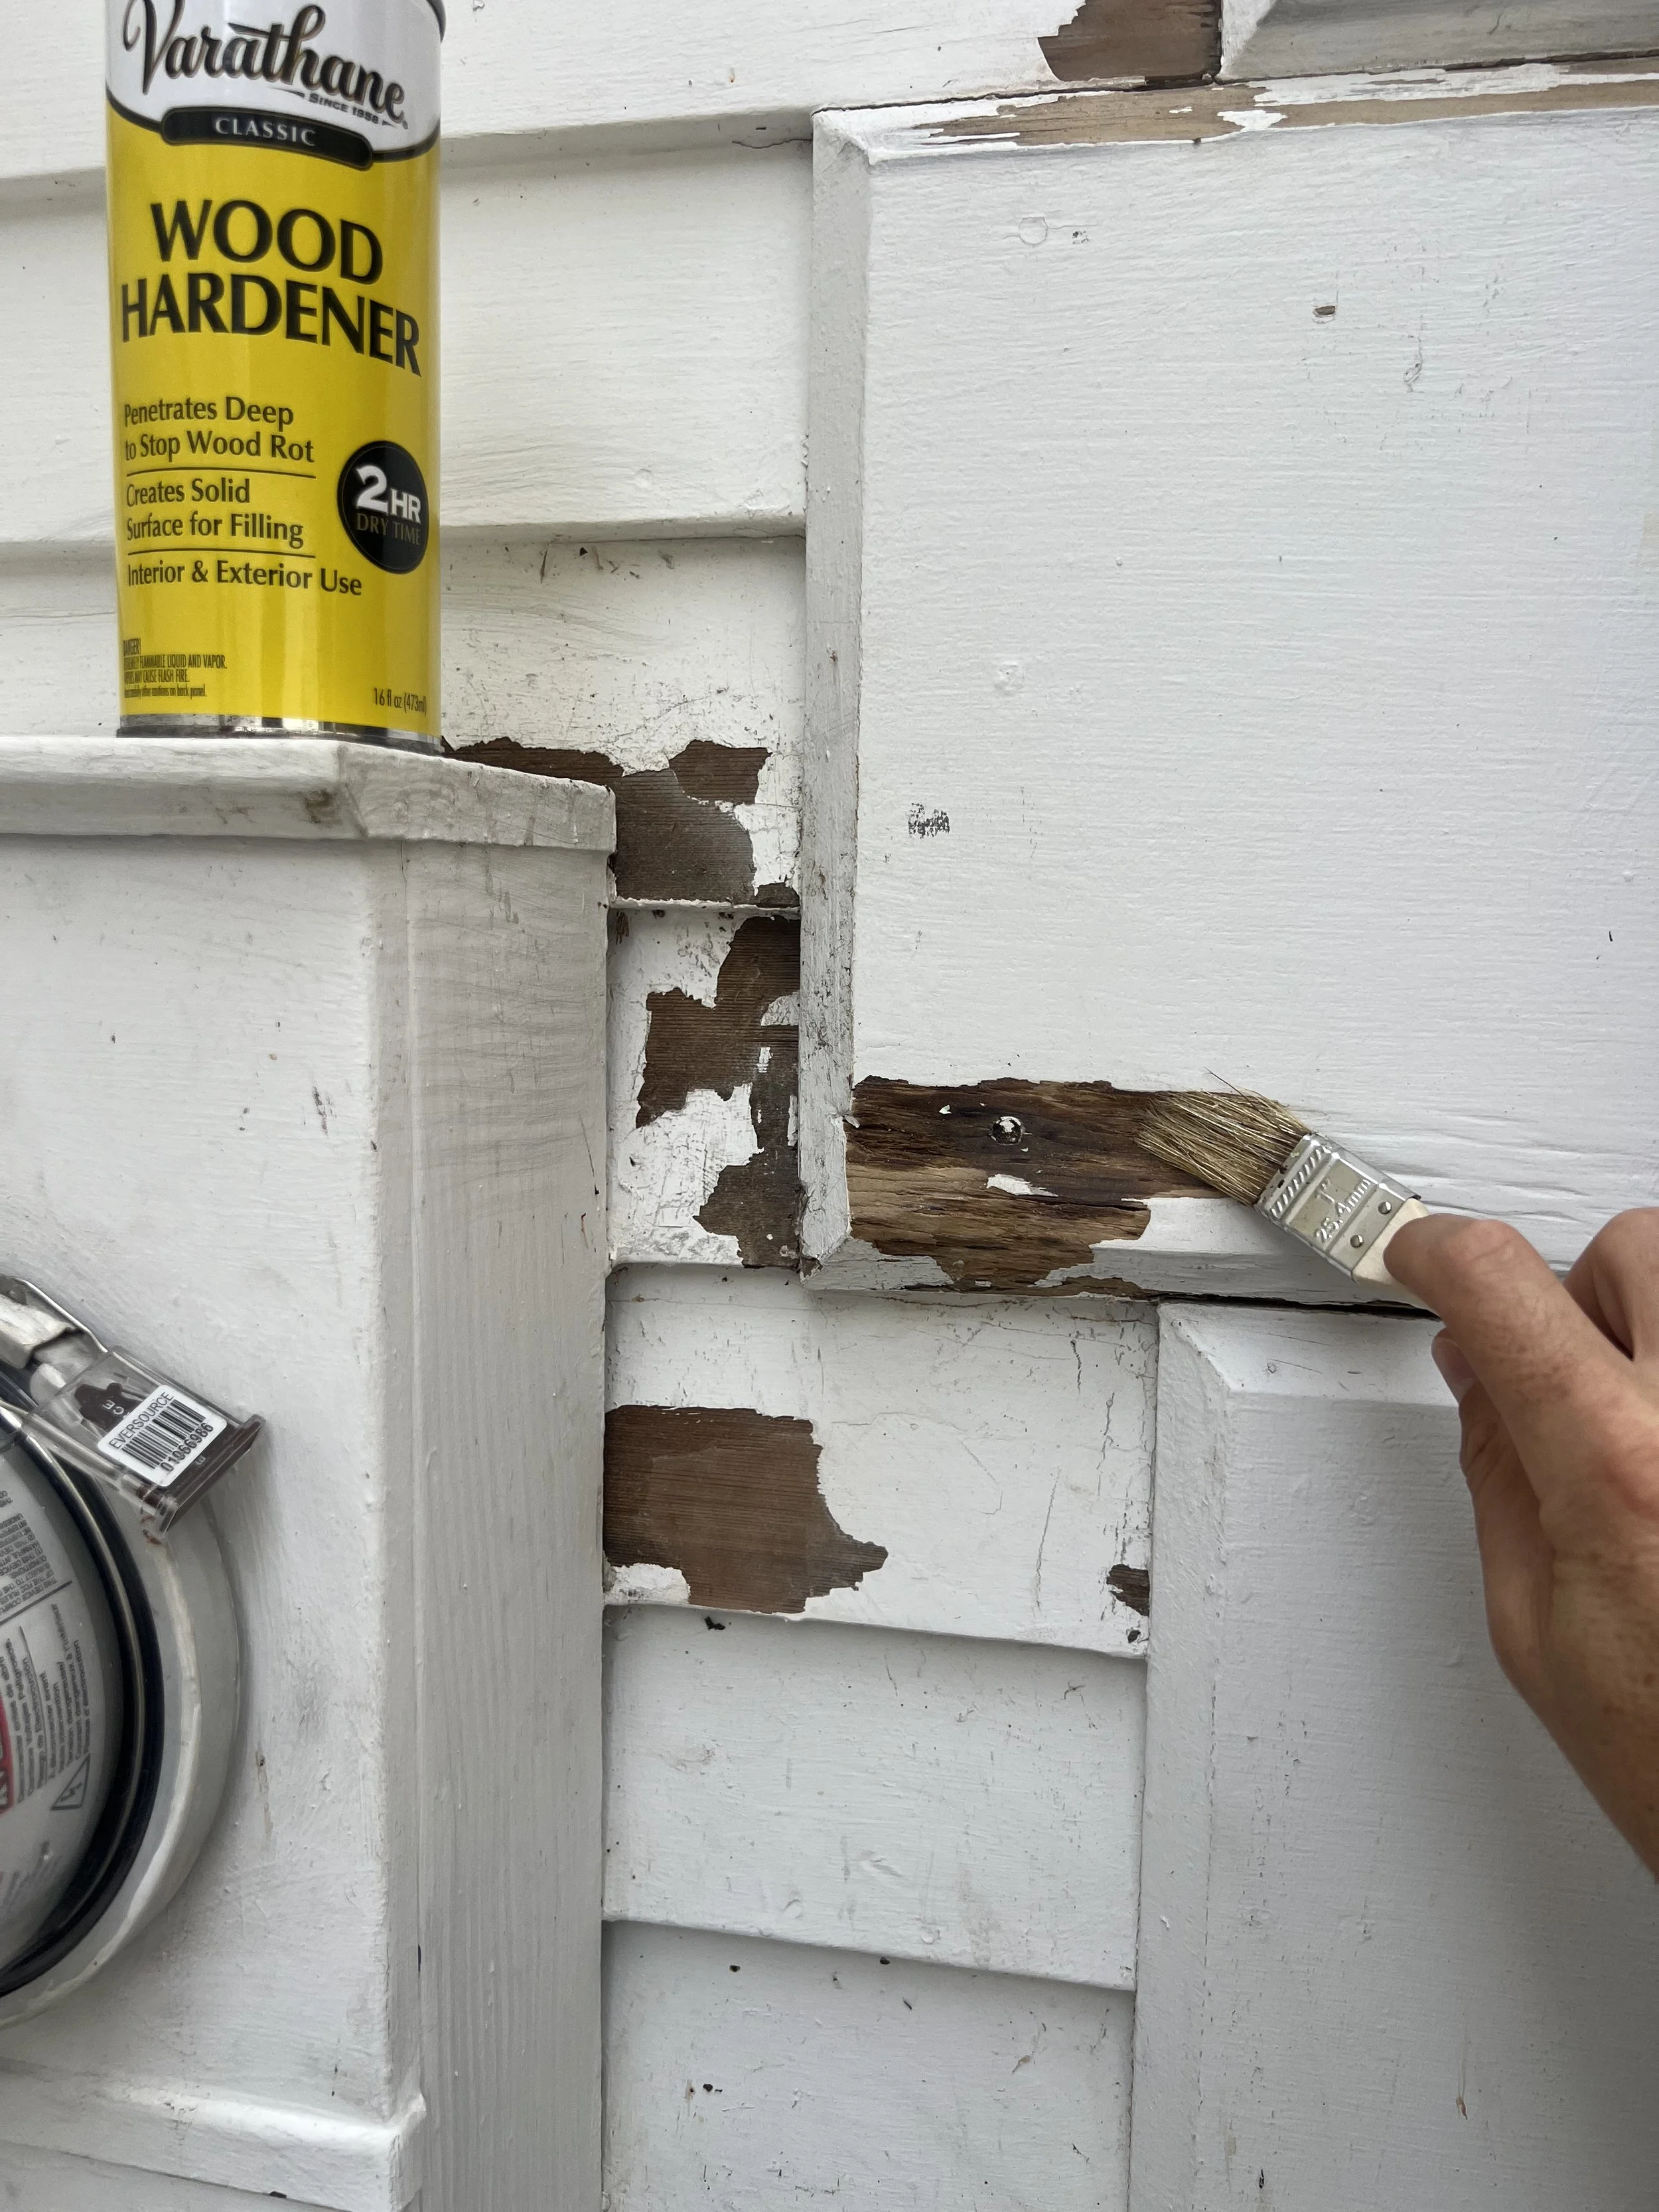
With the voids opened up, I treated the surrounding material with Varathane High Performance Wood Hardener, a stabilizer that soaks into the fibers and locks up whatever integrity remains. It’s strong stuff, with a thin consistency that wicks deep into cracks and saturates the edges of decay. You can actually see the fibers drink it in and start to firm up again. Once it cured, the wood felt crisp—ready to bond to something new instead of crumbling under a brush.
The next step was splicing in new wood. I cut patches from pine and cedar stock, shaping each one to fit the opening as tightly as possible. The trick is not to force it—tight enough to bond, loose enough to allow for bedding material. Each piece was set in place with a combination of hardener, Bondo All-Purpose Wood Filler, and a high-quality exterior epoxy for the larger gaps. The hardener sealed the seams, the filler locked everything together, and the result was surprisingly rigid—better than the surrounding original material, honestly.
From there, it became a sculpting exercise. I built out the surface with layers of filler, sanding between each application to match the existing contours. There’s an art to getting old clapboard or trim profiles right—the subtle bevels, the dips and shadows that make it look like original stock instead of a patch. It’s slow work, but once it starts blending in, it’s immensely satisfying.
Finally, every repaired surface was primed and sealed for paint. I used a shellac-based primer to lock in the repairs and prevent moisture migration, then rolled on a coat of ECOS exterior paint for the finish. Watching the clean, even color spread over a surface that had been so far gone—it’s one of those moments that makes all the dust, noise, and frustration worth it.
There’s still plenty of this kind of work ahead, but each repaired corner feels like progress in the truest sense: the slow reclaiming of a house that deserves to last. The tools may change, but the process—cut out the bad, stabilize the good, rebuild the rest—is the same rhythm that applies to any old structure, or any old project, really.
Next Steps
The goal now is to stay just ahead of the cold. Once the temperatures drop, every open seam and half-dried filler becomes a liability, so I’m working section by section, getting each repair sealed before the frost settles in. The rhythm is slow but steady: scrape, cut, harden, patch, sand, prime, paint… one board at a time. It’s not exactly glamorous, but it’s the kind of progress you can measure in the sound of the brush, the feel of a clean edge, the sweet smell of primer drying on wood that finally has its strength back.
The next few weeks will be about finishing the sunroom perimeter and moving down the north wall. I’ll work each stage in large enough sections that it’s worth breaking out the gear each time. Then it all gets primer and paint, tying the repaired sections back into the whole. There’s a satisfaction in watching that continuity return, knowing that what’s beneath the surface is now solid, trustworthy, and ready for winter.
But beyond the logistics, the bigger task is learning the pace of the house itself. You can’t force old materials to cooperate; you have to work on their timeline. Some days that means tearing into a project you didn’t plan to start. Other days it means stopping when the temperature or humidity isn’t right, even if your momentum says otherwise. You start to realize that progress here isn’t measured in speed—it’s measured in patience, in persistence, in staying out there long enough to make a little more right than was wrong the day before.
By the time the leaves finish dropping and the first frost settles on the grass, the exterior should be tight again. The structure beneath the paint will be resilient this time - strong, sealed, and coated. And when winter hits and the wind pushes against the windows, I’ll know that corner is holding firm because I made it hold.
Grandview has a way of teaching lessons you didn’t come here to learn. This one’s about time, endurance, and progress that doesn’t look like much but is regardless. One patch, one board, one wall at a time; that’s how you keep an old house standing. That’s how you turn ownership into stewardship.
The Discovery
What started as a simple paint prep turned into something closer to an archeological dig. I began at the sunroom—the one spot where we already knew there was rot—and figured I’d scrape, patch, and move on. But the second the scraper went in, it was clear this was going to be bigger. The paint, thick and deceptively fresh, gave way to soft, spongy wood beneath. In some places, the surface looked fine until I pressed, and the scraper just… sank.
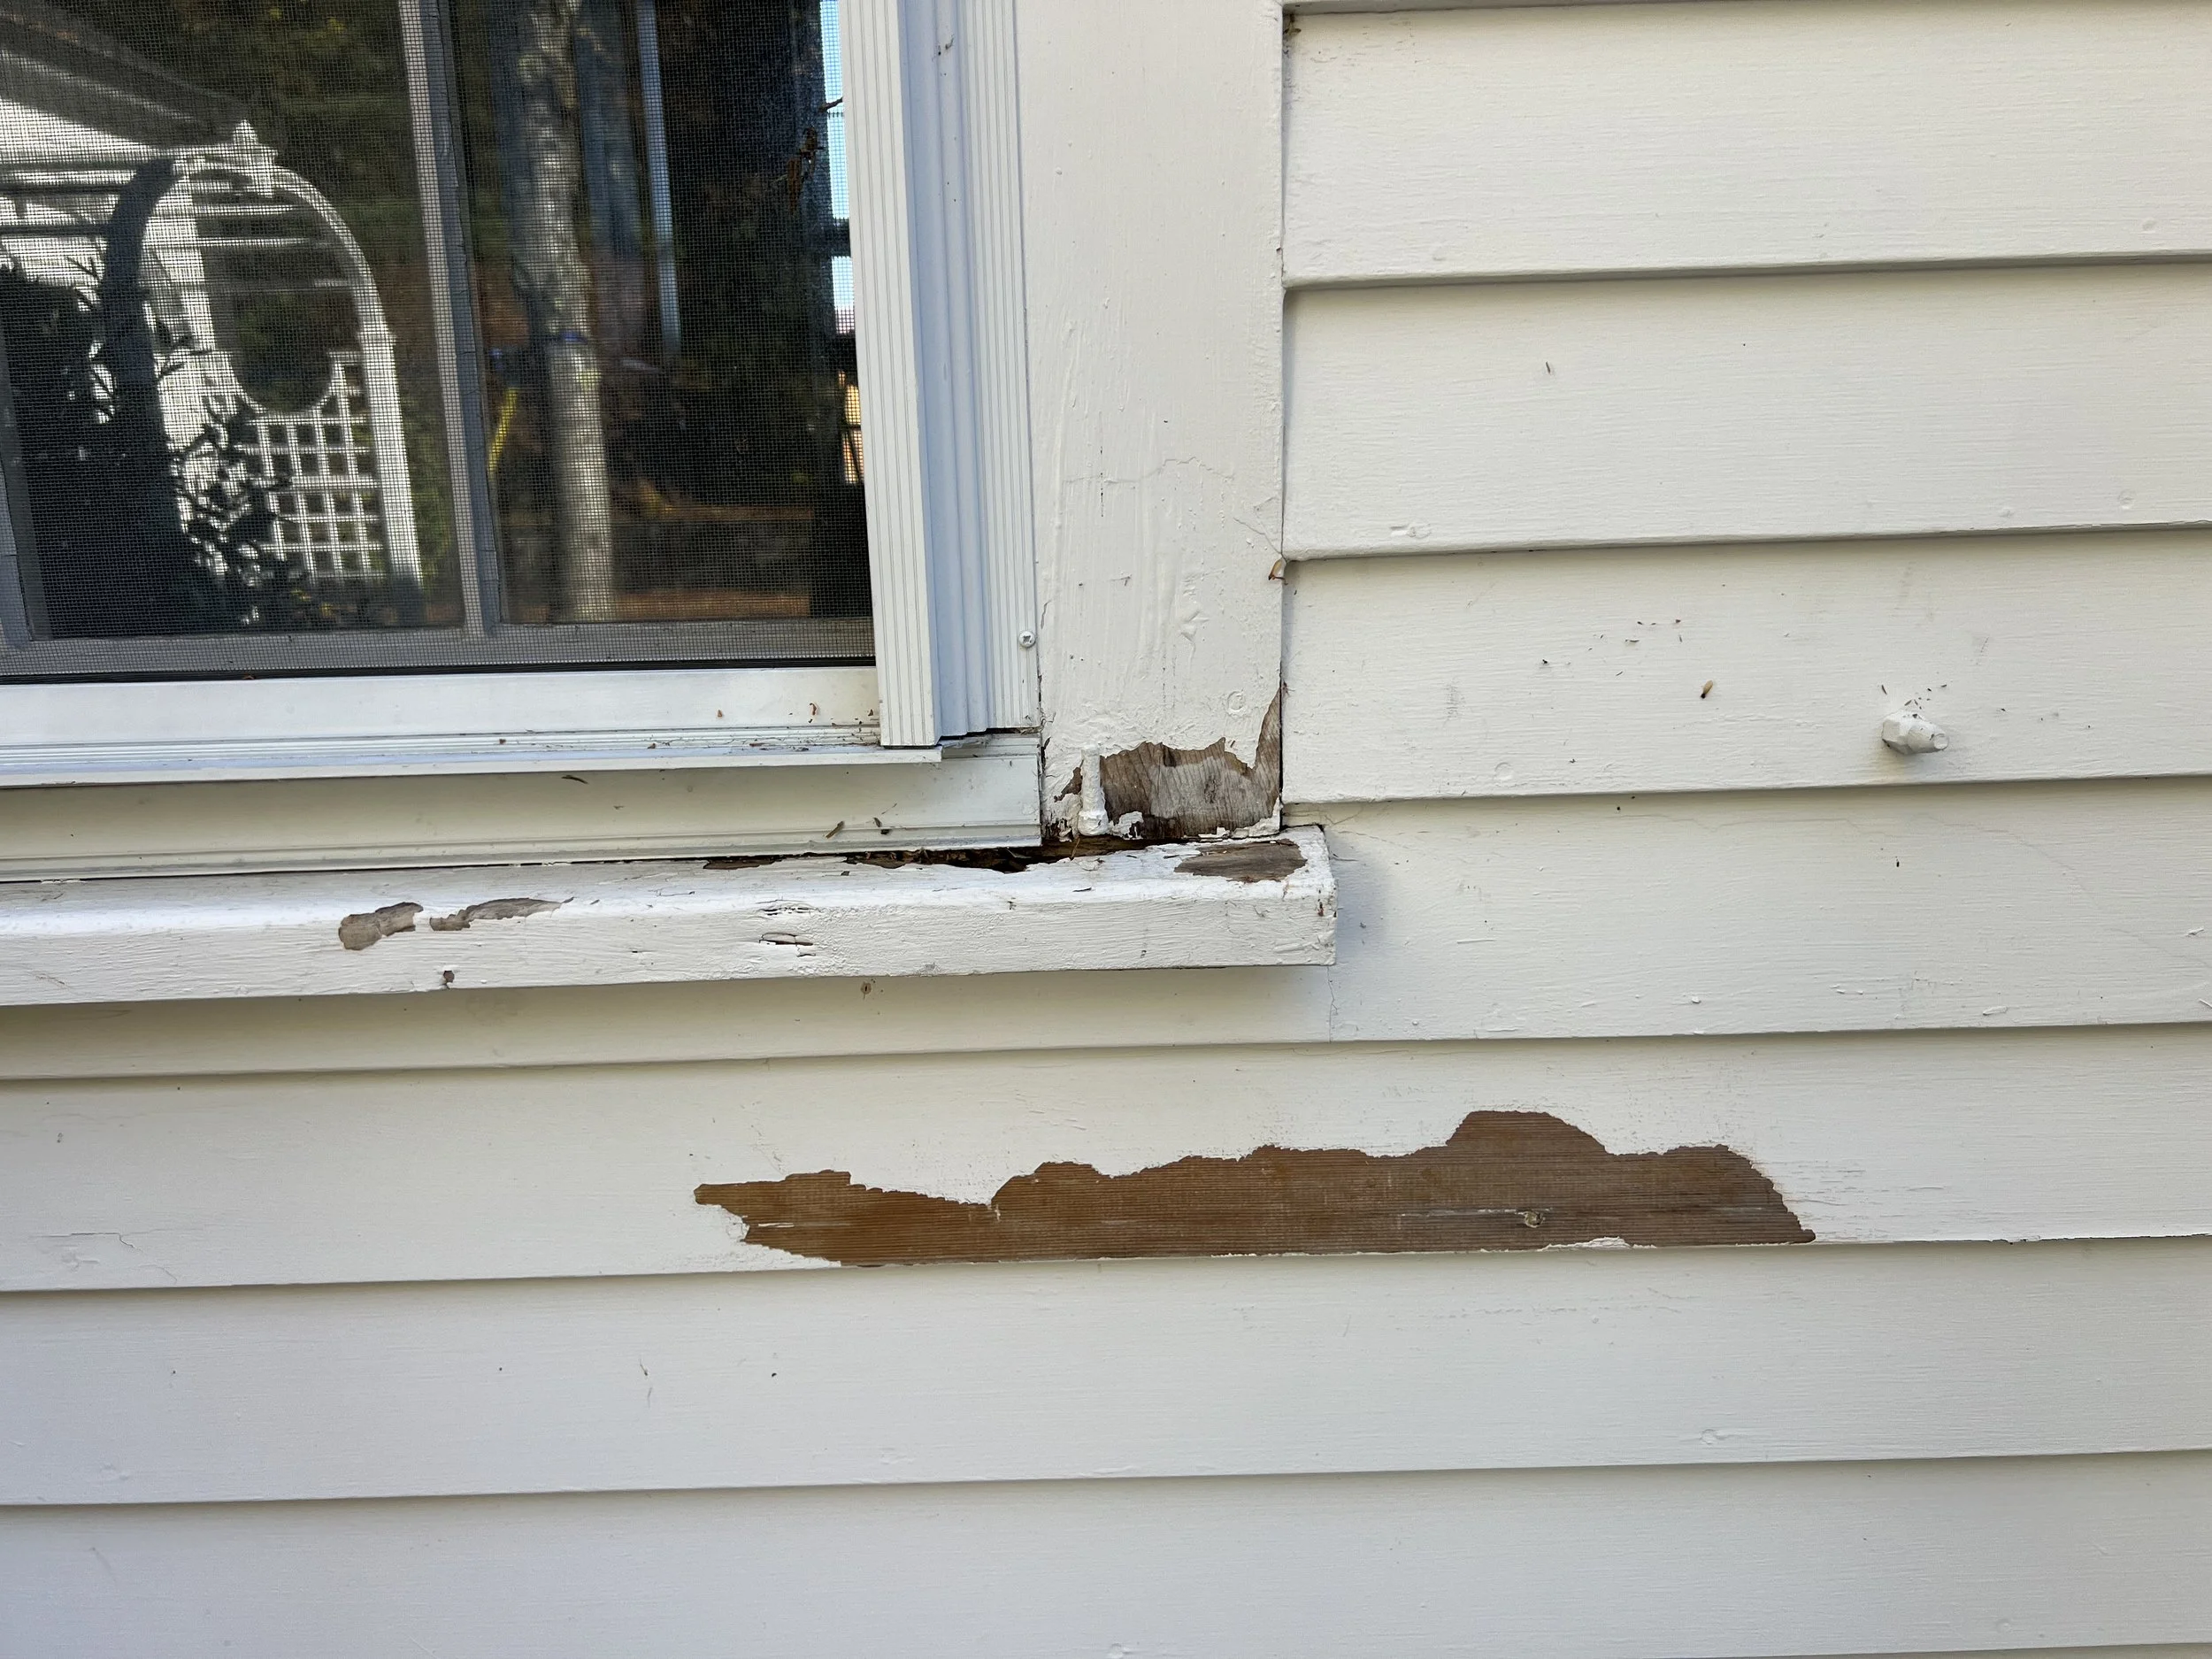
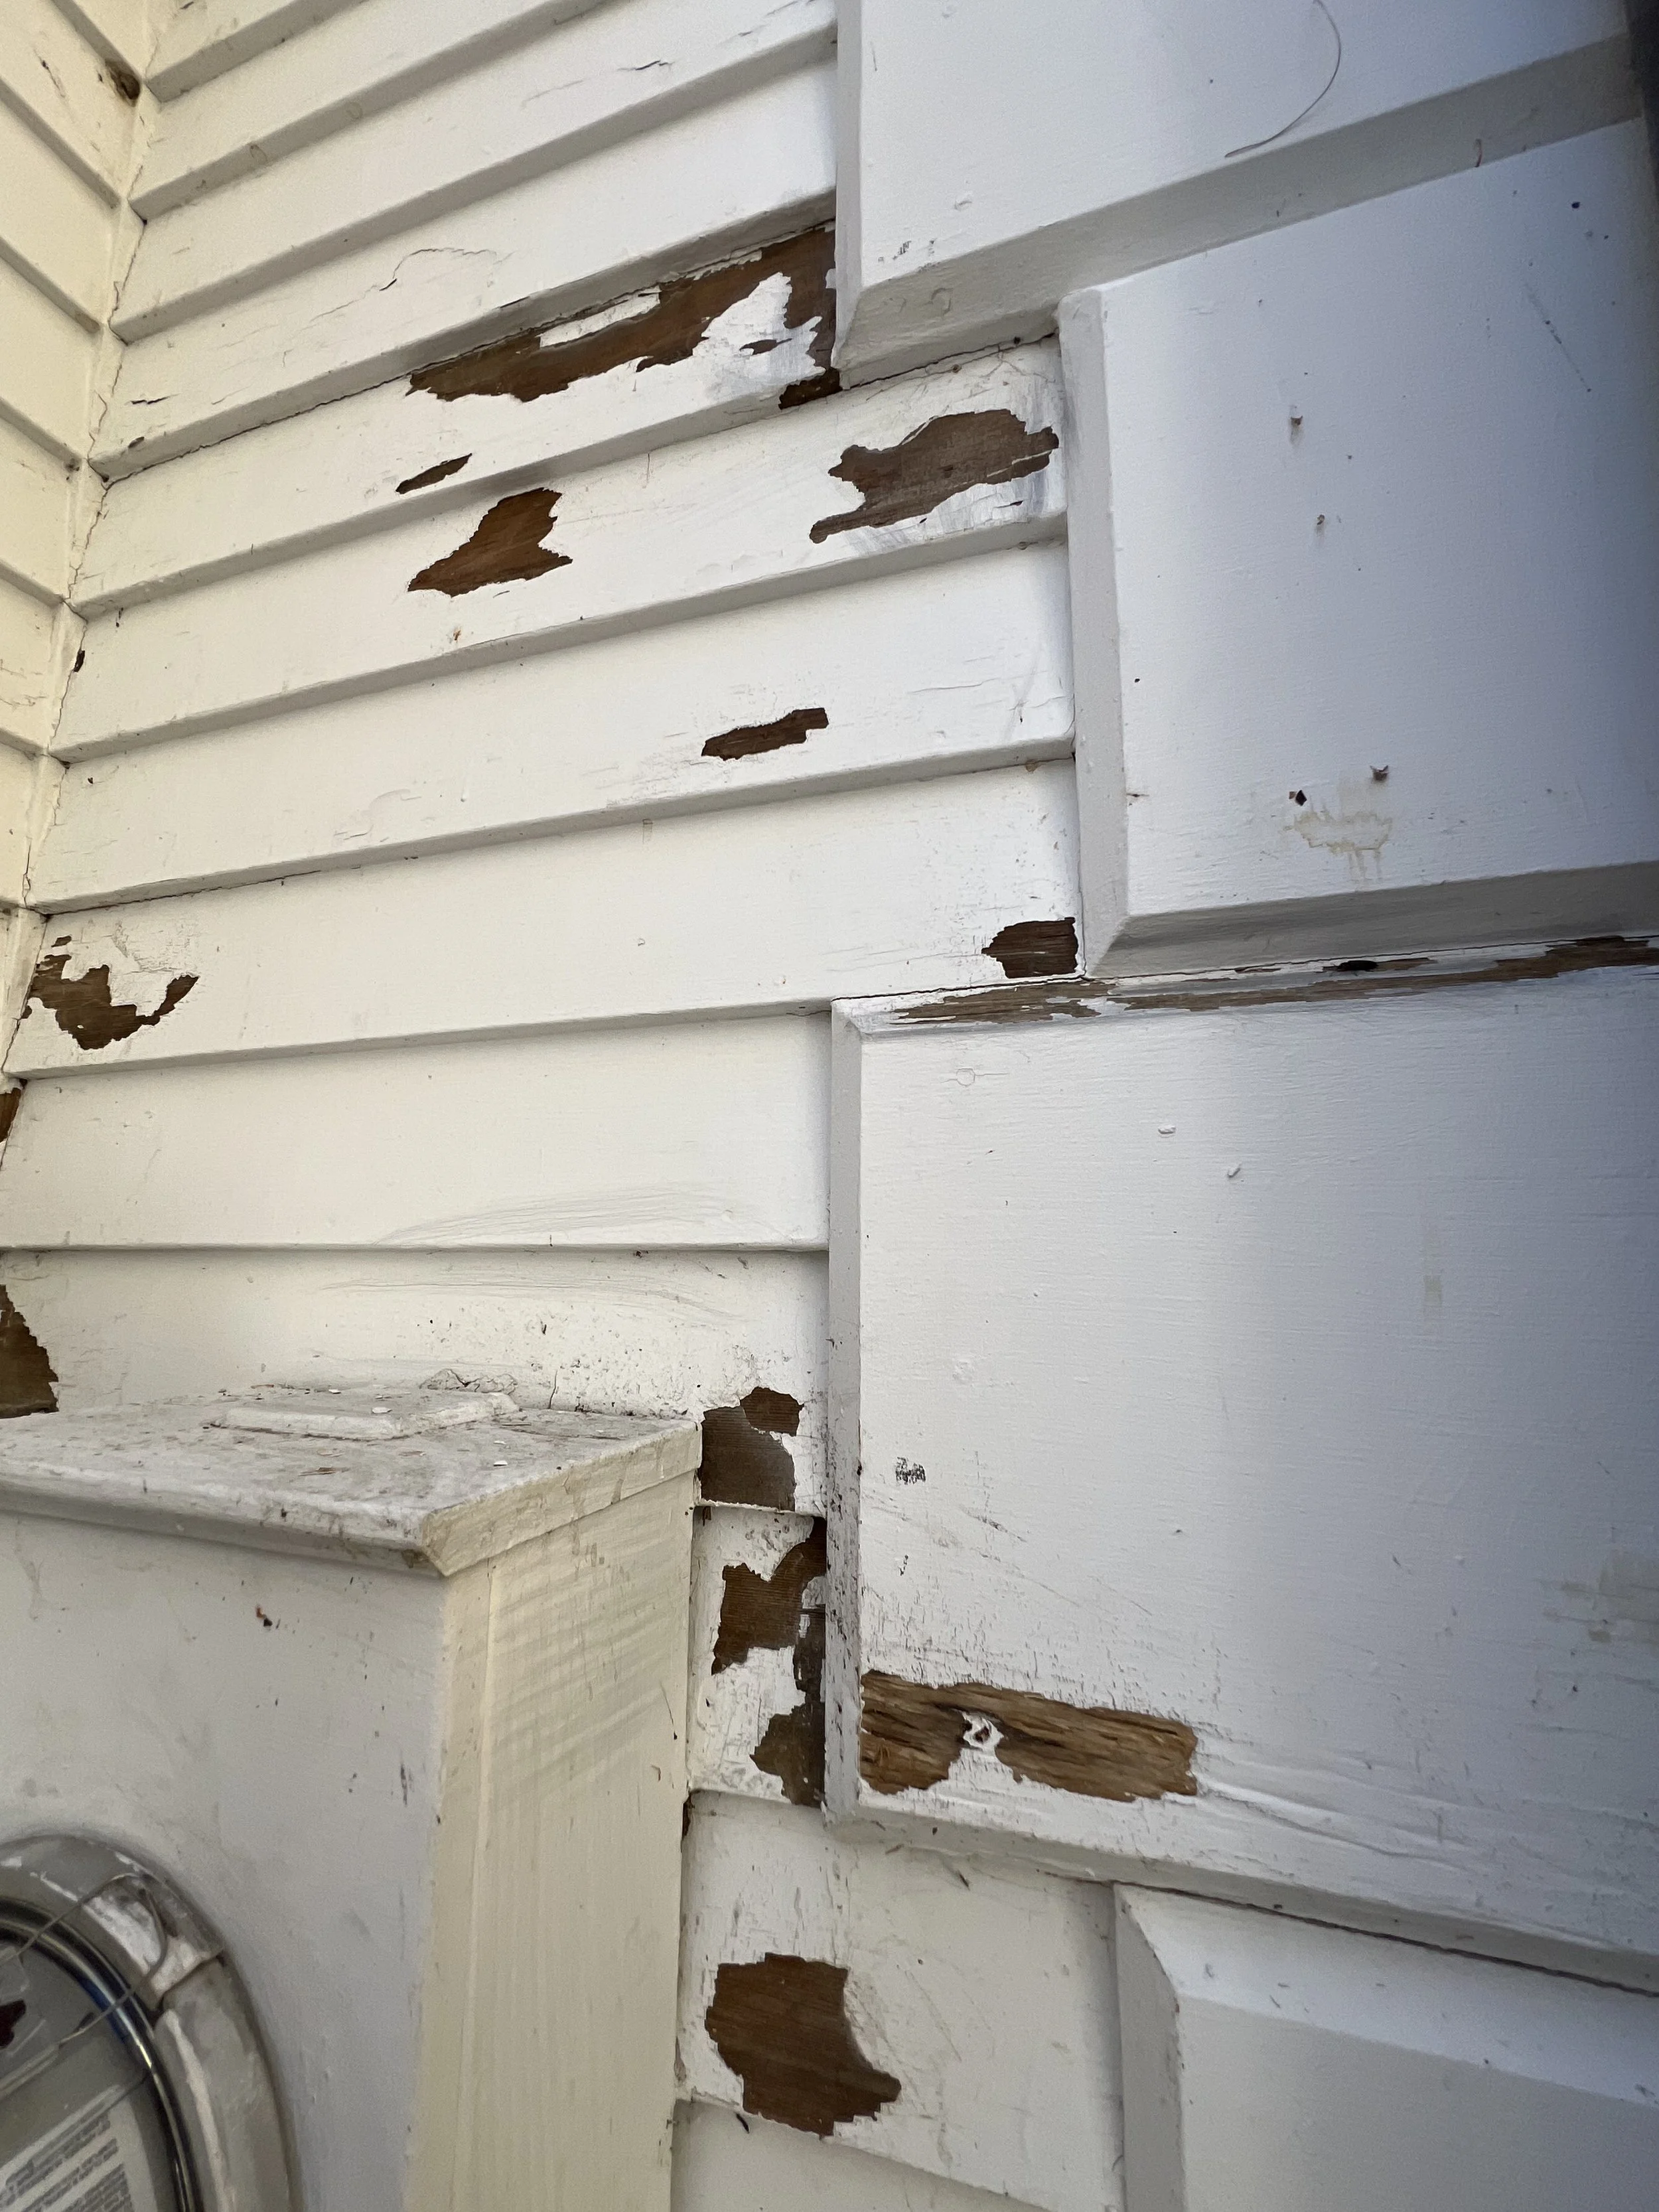
From there, things started spreading. I noticed a soft spot by the dryer vent—a place that didn’t even look that bad at first. I poked at it out of curiosity, and the more I dug, the more it crumbled. The “bad section” doubled, then doubled again, until the whole corner was exposed and hollow. The siding around it wasn’t far behind. One soft patch would lead to another, and by the time I was done chasing each new edge, I’d mapped a network of rot that ran the full height of the wall.
As I worked my way along the house prepping for paint, the pattern repeated. A chip here, a scrape there, and then the whole board would collapse under the weight of its own neglect. The damage wasn’t isolated—it was systemic. Years of water intrusion had crept in behind seams and flashing, quietly unmaking the structure from the inside out. You could see where past owners had tried to disguise it: caulked-over seams, thick coats of paint, even filler slathered straight onto rot. All of it was just paint-deep illusion.